Source
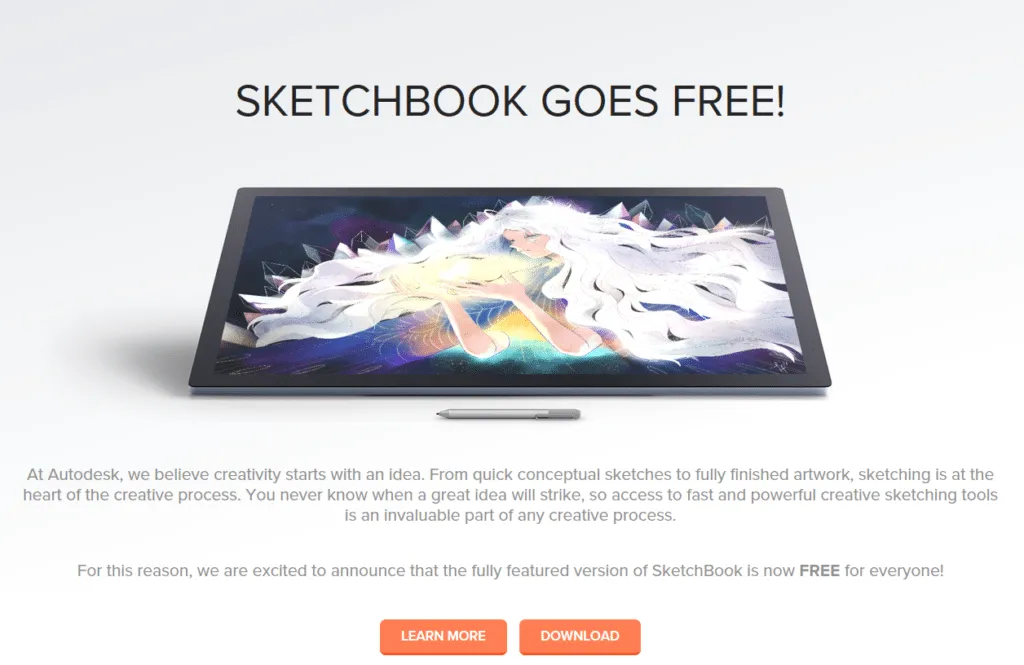
Looking around for a decent sketching app I remembered playing with Autodesk's Sketchbook a while ago. This always felt very natural to me so I popped onto their website HERE with a view to subscribing for the pro version. Imagine my shock when presented with this image!
Don't get me wrong, I don't mind paying for software when I make use of it, but if it's free? Hell yes! This apparently happened a few months ago. I clicked on the handy-dandy download button and was taken to a page with the options of acquiring it for Windows or OSX. On my platform, Windows, the download it a tad over 87Mb, on Mac just short of 80Mb. Very lightweight. I installed it on both my desktop PC and my Surface Pro 3. Incidentally, the full version is also free on both Android and iOS. I have a Samsung Galaxy Note 8 - which has a stylus - so I downloaded it for that too. On an iPad, you might want to consider getting the Apple Pencil first.
Source

Source
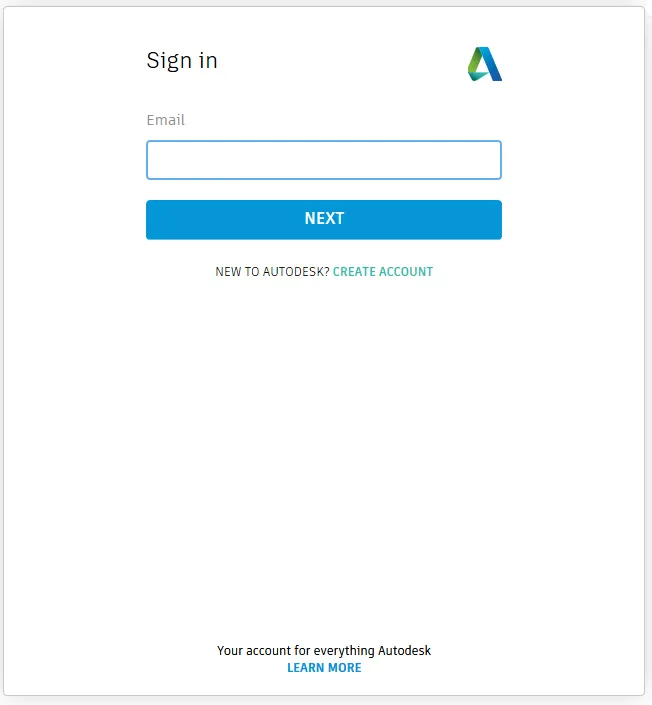
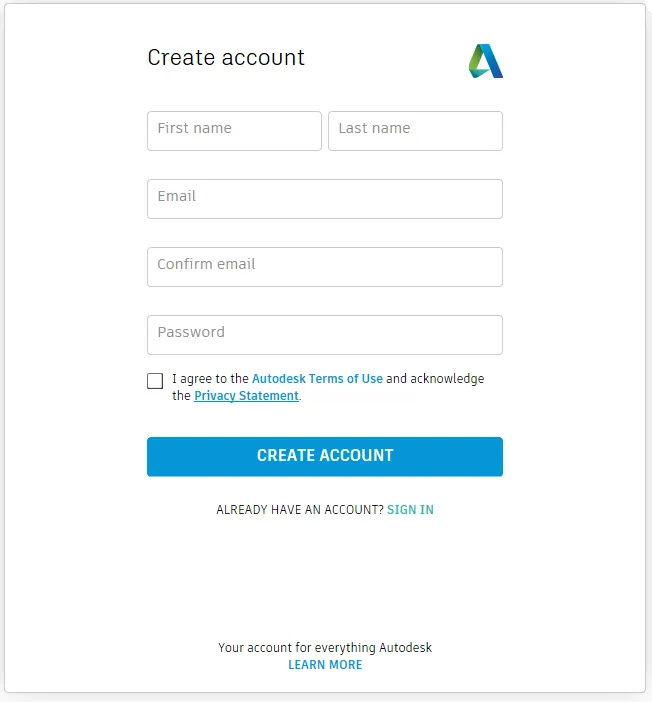
Don't worry, this is free if you don't already have one. In that case, click on CREATE ACCOUNT to be presented with the following window.
If you want to jump straight into Sketchbook, you can use it for 7 days without signing in. Once decided or signed in, you are presented with a very clean interface.
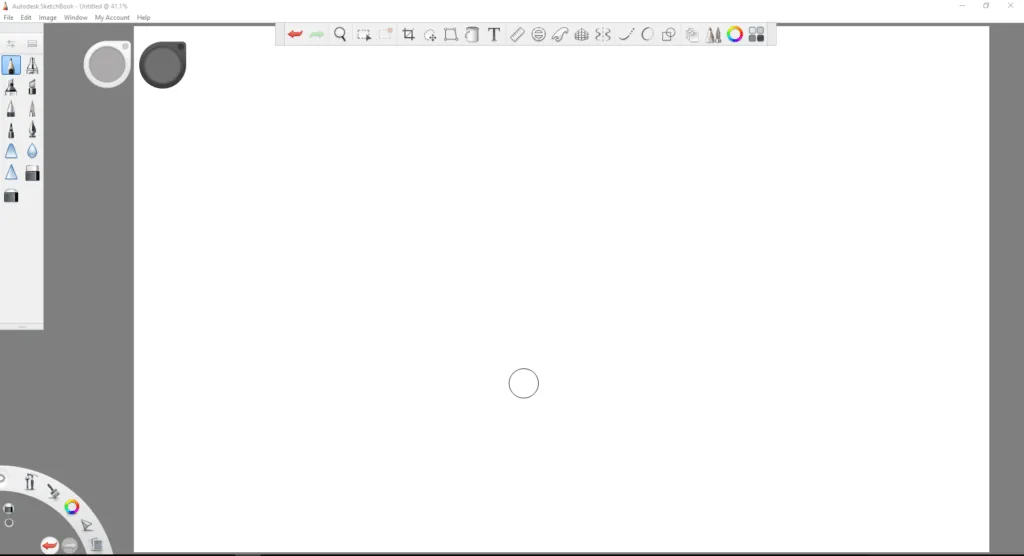
Bear in mind that this was built from the ground up to be used with tablets, so it may take a little while to get used to it while navigating with a mouse. For example, on my Surface Pro 3, I can use my fingers to zoom, pan and rotate the canvas. On my desktop, my tablet monitor only recognizes the pen, so I have to use SPACE to bring up this navigation widget or click on the magnifying glass in the top toolbar.


As you can see, the interface is very uncluttered, allowing you to focus on your drawing. Now, let's look at the toolbar. Click on the image to see it full size.

Like all other elements of the UI, this can be moved by clicking and dragging on the two small darker rectangles on either end. Some icons in the toolbar will open up other elements, such as the brush palette you see on the left. Again, look for the slightly darker rectangle - this time at the top, with which to click and drag this palette into a new position.
The brush puck allows you to click and drag left and right to change the size of the tool. Dragging up and down allows you to adjust the opacity or strength of the tool. The color puck allows saturation adjustment by clicking and dragging left and right, or luminance by sliding up and down. If you just click inside the color puck you will get a quick color selector. My preferred method for selecting color is by clicking the color editor in the top toolbar, which opens up this palette.

Like all palettes, this has a small circle at its top right. Click this to hide the palette.
The brush palette allows you to select different tools, pencils, and brushes. The icon on the left, circled in red, opens up the selected brush properties, in this case, the pencil. The icon circled in blue opens up the brush library, which contains other sets of tools.

It is possible to create your own sets which you would populate with your favorite tools and custom brushes, but I will cover that in a future post.

Only the previous Pro version had layers, but now that the software has gone free, we have them in Sketchbook. As you might expect, you can add, delete and merge layers here, lock them, duplicate them, move them up and down the order and add different blending modes such as multiply, hard light or color for different effects.

As I said earlier, the interface was built with tablets in mind and the lagoon allows for fast selection of various functions found throughout the toolbar and menus. For example, click and hold on the color wheel in the middle and drag to any of the colors presented to quickly change color.
![]()
I don't use it, but you may find it useful. In my case, I go to the top menu, click on Window and deselect Lagoon. You can turn other elements on and off here.

A useful keyboard shortcut is T which will quickly hide and then show the UI, meaning all of these windows will disappear to concentrate on your sketch. After a little playing around, testing pencils, changing tool properties and just generally messing about, I came up with this. Excuse the poor quality. I think you'll agree it looks very much like a traditional sketch.

Playing with other tools I got this quite painterly look.

All in all, I am very happy with Sketchbook. It really does feel like sketching on paper. I was quite surprised by some of the paint tools and took a look at Youtube, where I found Trent Kaniuga's channel. For those that don't know, he is a concept and comic book artist and illustrator who has worked on World of Warcraft, Diablo 3, League of Legends and lots more. He makes extensive use of Sketchbook and gets some great results, as you can see in one of his videos below.

It certainly gives me something to aim for.
Thanks for reading.
NOTE: this post contains affiliate links to Amazon.
Posted from my blog with SteemPress : http://www.muxxy.co.uk/2018/07/31/autodesk-sketchbook-and-my-traditional-art-journey/