
Another crafting for Christmas tutorial
Welcome to part 2 of the series "Crafting 4 Christmas" where I show you another DIY creation for Christmas. Part 1 was suitable for small children, this one isn't. To make this felt Christmas tree, you will be using a needle and thread. Experience is not needed, anyone can do this!
You could choose to decorate this tree, and let smaller children help with that. My ornament was quite small, so I decided to leave this one as is, but I plan on creating bigger ornaments as well and let my daughter help with the decoration.
Here's what you need

- green felt
- Christmas tree pattern
- scissors
- small piece of ribbon
- cotton thread
- needle
- cotton wool
There's also brown felt on the picture as I intented to create a different tree stam, but I ended up leaving it as is because of the size of my tree so you can ignore the brown felt for this tutorial. In case you picked a bigger pattern, I'd defo add a part of brown felt for the stam.
The process
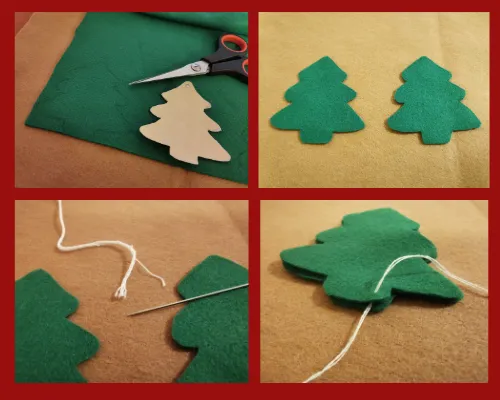
- Use the pattern to draw the Christmas tree on the felt.
- Cut out the tree pattern twice.
- Put the two cut out trees on top of each other.
- Start sewing on the bottom starting from the inside as
displayed in the picture.
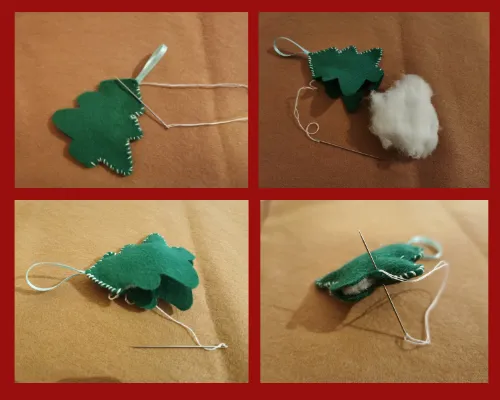
- When you are at the top of the tree, fold the ribbon and put it
in between of the two layers of the tree before you start
stitching it. - I decided to start adding cotton wool after I stitched another
part of the tree so that I could easily access the corners. - Now you can stitch until you reach the stam before you fill up
the rest of the tree. - The last step is to close the ornament with some final
stitches.
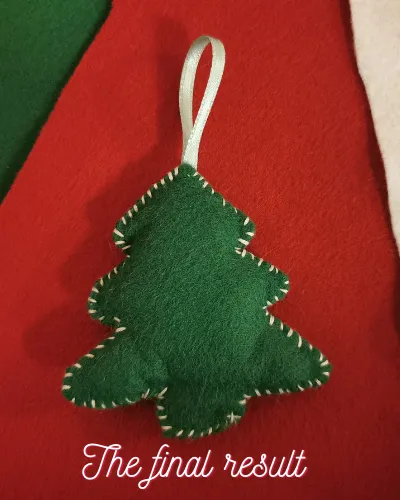
Now you can use the ornament to hang it in your Christmast tree or for other decoration purposes. During the next days, I will also create other ornaments like a gingerbread man from felt and reindeer.
Thanks for visiting and if you want to share your Christmas tree made from felt in a comment, please feel free to do so!
See you in the next part!