


Hello dear friends, today I want to submit my post for the ELECTRONIC WORLD contest. This contest is carried out by this community, I found out about it thanks to my friends @keco and @marcoquin who recommended me to participate because they believe that I comply with the conditions by witnessing my work. They are also great content creators who never stop following my posts and supporting me for that I extend my thanks to them. My participation is about the lunar vehicle of the Apollo 15 mission made with electronic materials, and I am very fanatic of real spaceships like science fiction. I hope you like my contribution and then I leave the process explaining how I did it.
Hola queridos amigos hoy quiero presentar mi publicación para el concurso ELECTRONIC WORLD. Este concurso es llevado a cabo por esta comunidad, me enteré de él gracias a mis amigos @keco y @marcoquin quienes me recomendaron participar porque creen que cumplo con las condiciones al ser testigos de mi trabajo. Ellos tambien son geniales creadores de contenido que nunca dejan de seguir mis publicaciones y apoyarme por eso extiendo mi agradecimiento a ellos. Mi participación trata del vehiculo lunar de la mision Apolo 15 hecho con materiales electronicos, uy muy fanático de las naves espaciales reales como de ciencia ficción. Espero que les guste mi aporte y a continuación dejo el proceso explicando como lo hice.

Work materials:
- Razor
- Screwdrivers
- Tweezers
- Tongs
- Super glue
- Electronic equipment such as hard drives and circuit boards
Materiales de trabajo:
- Navaja
- Destornilladores
- Pinzas
- Tenazas
- Super pegamento
- Equipos electronicos como disco duros y placas de circuitos

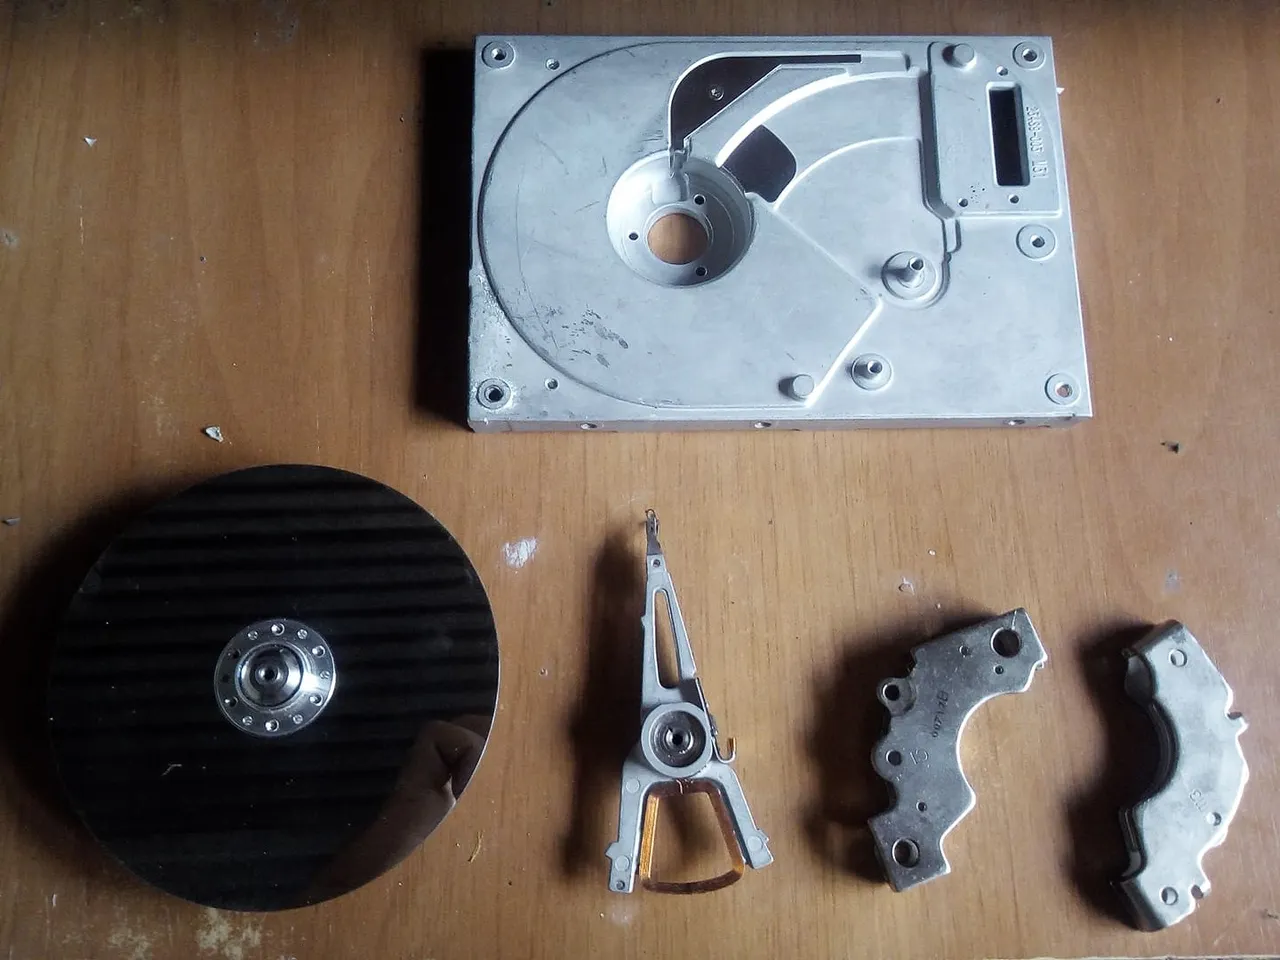
The raw material for this work is PC hard drives. I have taken 4 and I have disassembled them in all their parts, I will use the motor for the wheels and also the connecting bridges.
La materia prima para este trabajo son los discos duros de PC. He tomado 4 y los he desarmado en todas sus partes, utilizaré el motor para las ruedas y tambien los puentes de conección.


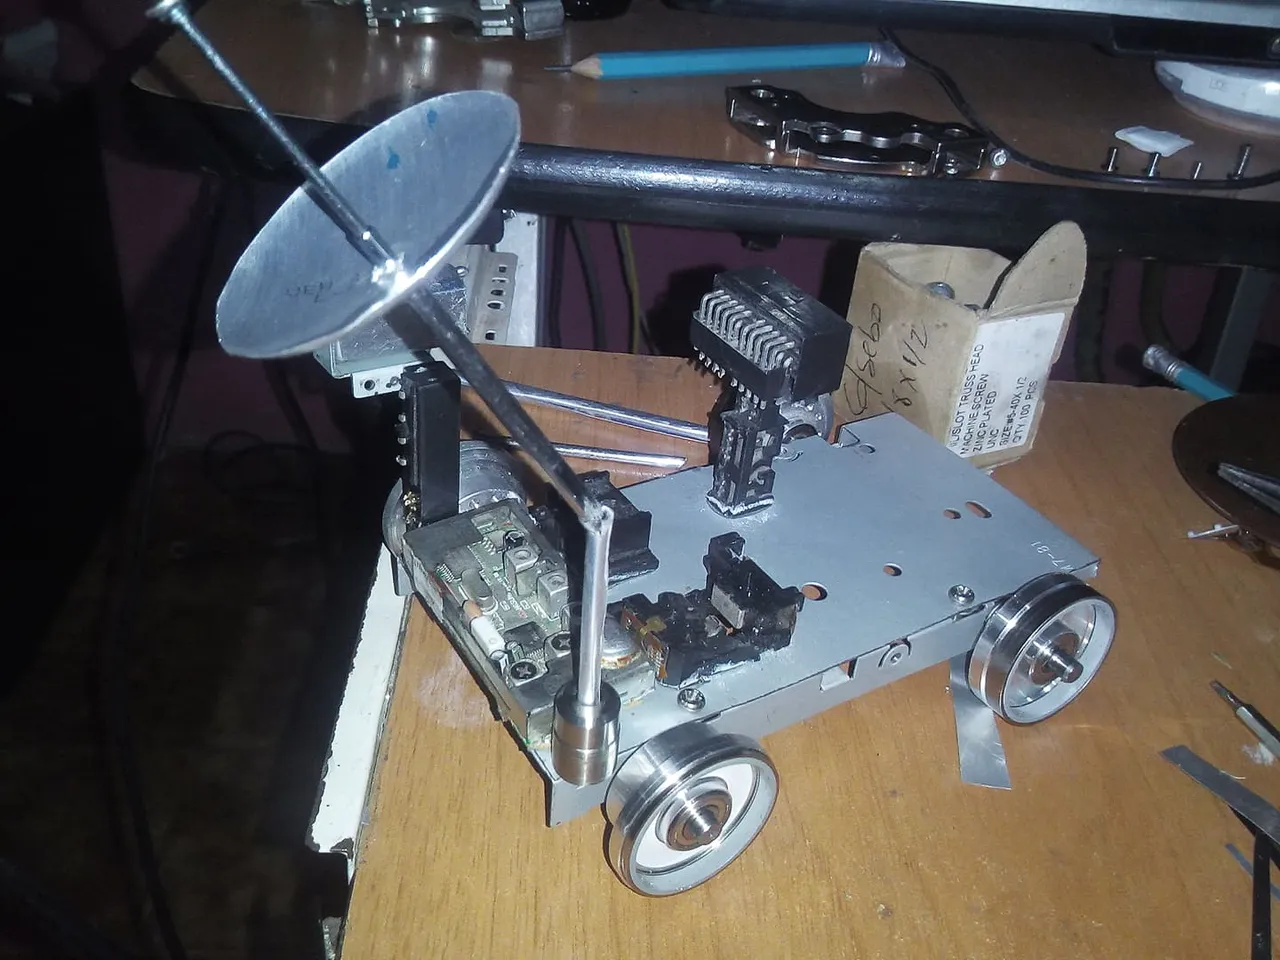
First we extract the motors from the hard drives, once we have them we remove the protector to keep only the part that can rotate. For the chassis I have used an old floppy drive, I took the bottom part. I decided to use this for the chassis because metal is more malleable and easier to drill. Once we have the wheels and the chassis, we proceed to place them in the holes on the sides using screws and nuts. We adjust them very tightly so that the wheels do not come off.
Primero extraemos los motores de los discos duros, una vez los tengamos le quitamos el protector para quedarnos solo con la parte que puede girar. Para el chasis he utilizado una unidad de discket vieja, tomé la parte inferior. Decidí usar esto para el chasis porque el metal es más maleable y facil de perforar. Una vez tengamos las ruedas y el chasis procedemos a colocarlas en los agujeros de los costados usando tornillos y tuercas. Los ajustamos con mucha fuerza para que las ruedas no se salgan.


Then we start with the first part of the accessories of the moon rover. First we put this circuit box extracted from a CD player and glued it to the front, it represents the electric batteries that the Apollo mission vehicle used and that supplied it with power. Then we put some connection bridges that represent the monitoring screen that goes from the pilot's side and finally an antenna to communicate with the base on the ground.
Luego comenzamos con la primera parte de los accesorios del vehículo lunar. Primero Colocamos esta caja de circuitos extraída de un reproductor de cds y la pegamos en la parte frontal, representa las baterías eléctricas que usó el vehículo de la misión Apolo y que le proporcionaba energía. Después colocamos unos puentes de conección que representan la pantalla de monitoreo que va del lado del piloto y por ultimo una antena para comunicarse con la base en la tierra.


Then it is time to make the antenna that sends and receives signals to the lunar module. this antenna was important for the explorers since the rover could not go more than 10 km from the lunar module, any interference meant a great risk of getting lost. I took the antenna of a radio and cut it and put a metal base on it, the satellite dish is made with the bottom part of the base of a beer can.
Después toca hacer la antena que envía y recibe señales al módulo lunar. este antena era importante para los exploradores ya que el rover no podía alejarse más de 10 km del módulo lunar, cualquier interferencia significaba un gran riesgo de perderse. Tomé la antena de un radio y la corte y le puse una base de metal, la parabólica esta hecha con la parte inferior de la base de una lata de cerveza.


The third part of the accessories includes another communication antenna that goes to one side of the monitor, a cable that feeds current from the batteries to the monitor and some panels on the front.
La tercera parte de los accesorios incluye otra antena de comunicación que va a un lado del monitor, un cable que alimenta con corriente de las baterías al monitor y unos paneles en la parte frontal


The last part is to make the seats, for this we use a metal mesh that comes as a protection on some hard drives. We cut it in half with a hacksaw and shape the seats by bending them with pliers. We must measure with a ruler where we will bend the metal so that it does not come out crooked. Then when we have the two seats we can fix them on the chassis with screws and nuts, opening a hole, we can also use super glue, I chose the first option.
La última parte es hacer los asientos, para ello utilizamos una maya de metal que viene como protección en algunos discos duros. La cortamos a la mitad con una segueta y moldeamos los asientos doblandolos con un alicate. Debemos medir con una regla por donde doblaremos el metal para que no salga torcido. Luego cuando tengamos los dos asientos podemos fijarlos en el chasis con tornillos y tuercas, abriendo un agujero, también podemos usar superpegamento, yo elejí la primera opción.


This is the final work. All the parts have been placed with super glue, the vehicle can roll thanks to the fact that the engines have a shaft that can be used for any transmission. For the Apollo 15, 16 and 17 missions, 3 copies of these vehicles were built, which never considered their return to our planet, so they are still on the lunar surface after more than 40 years. These vehicles are special because they belonged to a time where the world was almost destroyed by a nuclear war, fortunately the military powers took their competition to the space race and thus it was possible to reach the moon. It is proof that human beings can achieve great things when we do them for good. I hope you liked my work and my participation in the contest, I say goodbye to you soon.
Así ha quedado el trabajo final. Toda las piezas han sido colocadas con super pegamento, el vehículo puede rodar gracias a que los motores tienen un eje que sirve para cualquier transmisión. Para las misiones Apolo 15, 16 y 17 fueron construídos 3 ejemplares de estos vehículos los cuales nunca se plantearon el retorno de ellos a nuestro planeta, por lo que estan aún en la superficie lunar después de mas de 40 años. Estos vehículos son especiales porque pertenecieron a una época donde el mundo casi se destruye por una guerra nuclear, afortunamente las potencias militares llevaron su competencia a la carrera espacial y así se pudo llegar a la luna. Es una prueba de que los seres humanos podemos lograr grandes cosas cuando los hacemos para el bien. Espero les haya gustado mi trabajo y mi participación en el concurso, me despido hasta pronto.