
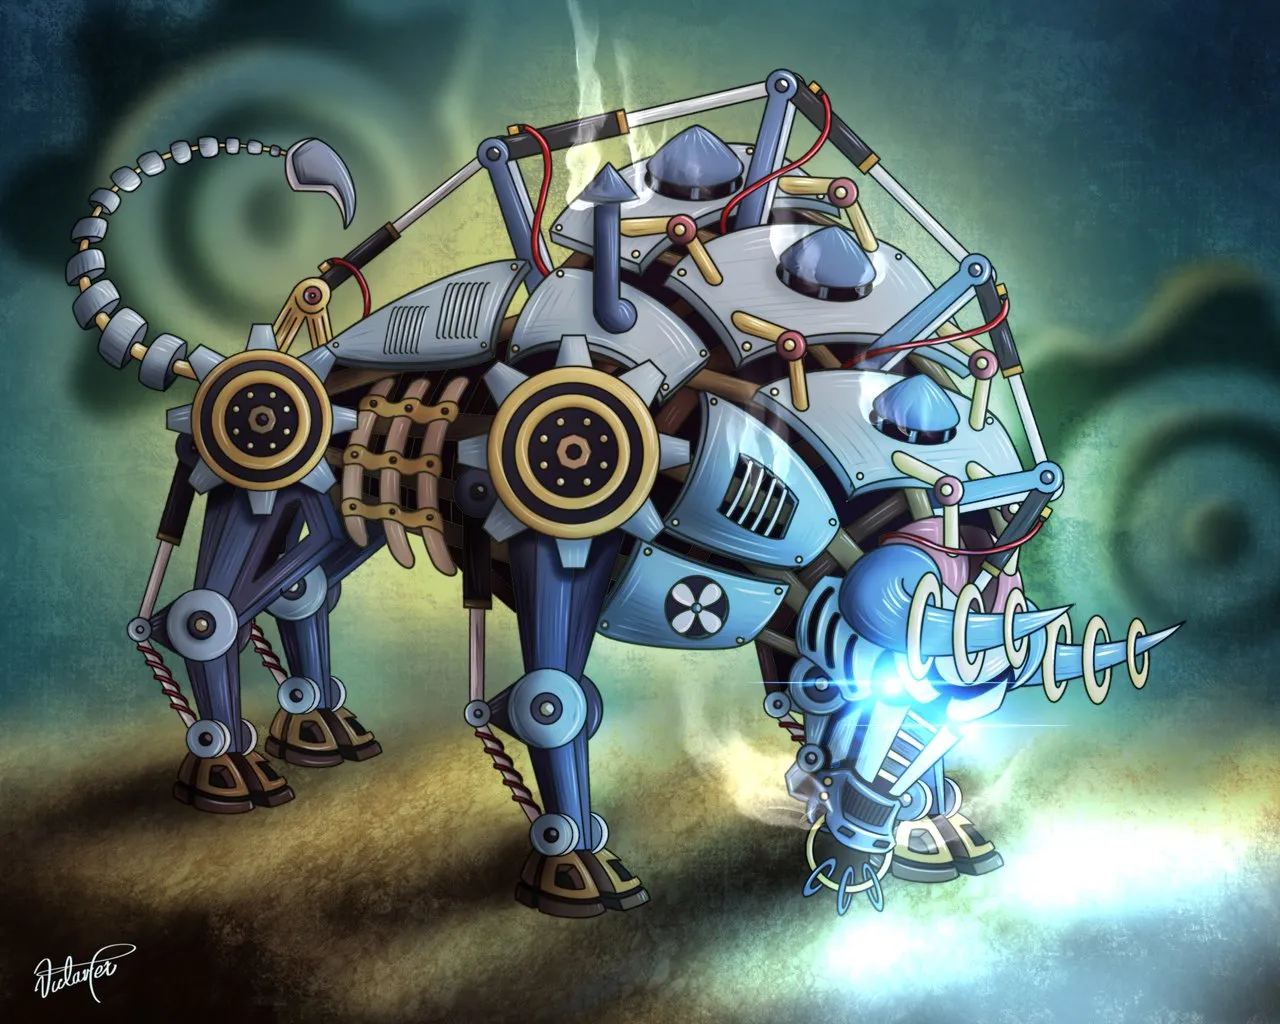
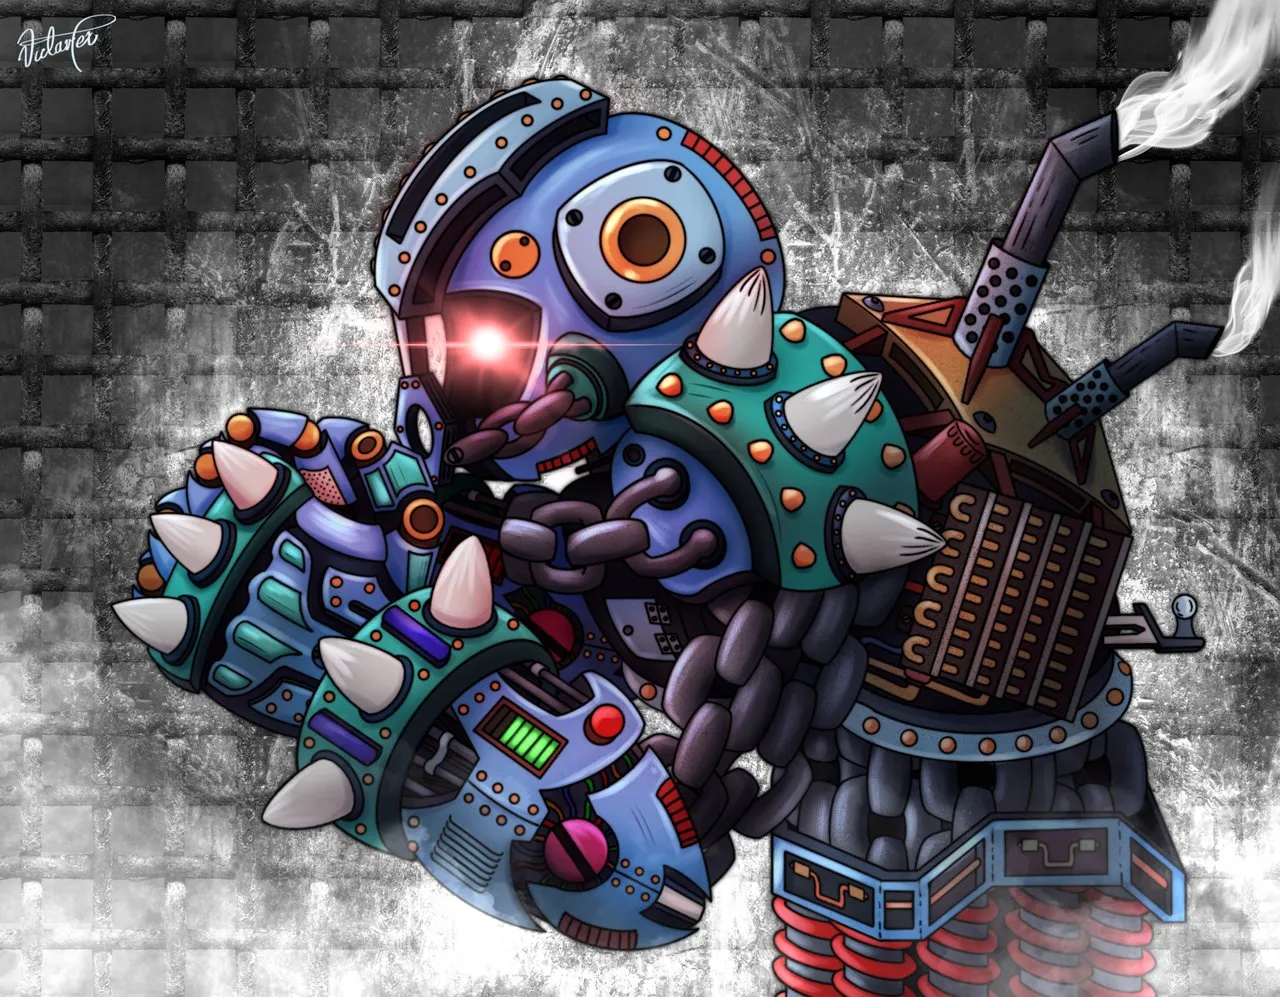
Hello everyone dear community, have a happy evening, day or afternoon. Lately as you may have noticed I have been practicing new drawing techniques, more in the style of comics, I really liked the previous design of the splinterlands art contest, specifically the Golem Chain, because of how entertaining it is to make these designs I decided to share with you another work with this technique, for that reason I chose to make Raging Impaler, a kind of mechanical bull.
Next I show you the step by step of the development of the illustration.
Hola a todos querida comunidad, tengan todos una feliz noche, día o tarde. Últimamente como ya se habrán dado cuenta he estado practicando nuevas técnicas de dibujo, más al estilo de los cómics, me gusto mucho como quedo el diseño anterior del concurso de arte de splinterlands, específicamente el Golem Chain, debido a lo entretenido que es realizar estos diseños decidí compartir con ustedes otro trabajo más con esta técnica, por tal motivo elegí a realizar a Raging Impaler, una especie de toro mecánico.
A continuación les muestro el paso a paso del desarrollo de la ilustración.

Drawing development / Desarrollo ✏️
The Raging Impaler character was developed in a comic drawing style, here we kept the line art and then applied the base color, once the color scheme was ready, we proceeded to place general shadows, occlusion shadows, glows and lights to highlight the design.
Se desarrolló el personaje de Raging Impaler a un estilo comic de dibujo, aca se mantuvo él line Art para luego aplicar el color base, una vez con el esquema de colores listo, se procedió a colocar sombras generales, sombras de oclusion, brillos y luces para resaltar el diseño.

First I made a quick sketch of the bull, creating more or less the base structure of the bull's body. Then I went on to detail the figure a bit more, adding different mechanical elements that will accompany our design.
Primero realicé un boceto rápido del toro, creando más o menos la estructura base del cuerpo del toro. Luego pase a detallar un poco más la figura, agregando diferentes elementos mecánicos que acompañará a nuestro diseño.
 |  |
|---|
We proceed to refine the lines of our sketch, for such action we proceed to opaque the sketch layer and in a new layer and a precise brush we start detailing all our drawing.
Pasamos a refinar las líneas de nuestro boceto, para tal acción procedemos a opacar la capa del boceto y en una capa nueva y un pincel preciso empezamos detallar todo nuestro dibujo.
 |  |
|---|
Now we move to the coloring of the figure, here I use a separate layer to place the colors, and in the outline layer I apply the command "reference" this will allow me to draw in all the area of the outline without leaving that area.
Ahora pasamos al coloreado de la figura, acá uso una capa aparte para colocar los colores, y en la capa del delineado le aplicó el comando “referencia” esto me permitirá dibujar en todo el área del delineado sin salirme de esa zona.
 |  |
|---|
Now we move to the step of the shadows and glows, here we simply choose the clipping mask option, this allows us to paint over the entire figure without leaving it, we apply cool tones and low saturation for the shadows, then we apply a multiply blend method. For the highlights we do the same, but with warm tones and using an add blend method.
Ahora toca el paso de las sombras y brillos, acá simplemente elegimos la opción de máscara de recorte, está nos permite pintar por sobre toda la figura sin salirnos de la misma, aplicamos tonalidades frías y de baja saturación para las sombras, luego le aplicamos un método de mezcla multiplicar. Para los brillos hacemos lo mismo, pero con tonalidades cálidas y usando un método de mezcla en añadir.
 | |
|---|
Used tools / Herramientas usadas📌
- Programs: Imovie
Procreate
SketchBook
Tablet: Ipad Pro
Apple PencilBrushes: Airbrush
Pencil
Felt-tip pen
Skin brushTime: 14 hours

Past drawings / Dibujos pasados 🔙
 |  |  |  |
|---|
Thank you for your attention. We'll see you again in the next post, don't miss it.
Gracias por la atención prestada. Nos veremos de nuevo en el proximo post, no se lo pierdan.
 °
°


Copyright © @victartex - All Rights Reserved. Design and editing by own authorship.
El punto de partida de todo logro es el deseo.
Napoleon Hill