
Pot holders: CUPCAKE - Crochet
Source : Photo taken by author @xeliram on a cell phone.
Hello, dear members of all communities, particularly all needlework artists. Welcome back to my blog. This is my first post on Hive. In this opportunity I knitted a pot holder for a pastry cook, although it has some details that I hope to improve for the next one I make, I wanted to share with you the process of its elaboration.
Materials
| Needle (1.45mm or 3) |
| wool yarn |
| Scissors |
| wool needle |
Development
- Take a thread of various colors and make 50 chains, if you want a larger pot holder you make more chains.
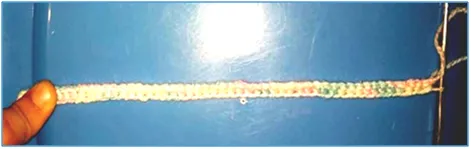
Source : Photo taken by author @xeliram on a cell phone.
- One chain, we turn and perform 50 half points high.
- One chain, turn and make 17 high half stitches, change color to blue and make 16 high half stitches and change again to various colors knitting 17 high half stitches.
- one chain, turn and make 17 high half stitch and change the thread to blue to continue knitting the basket, we must make high half stitch in relief in front and behind, it is a little difficult with this stitch because we have little space, so be patient the first stitches are the most difficult making 16 stitches, we change the thread again and make 17 high half stitch.

Source : Photo taken by author @xeliram on a cell phone.
- A chain, we turn and make 16 half high stitches we change color to blue and again we make relief in front and behind we make 18 stitches of relief, we change again thread knitting 16 stitches.
- A chain, turn and make 15 stitches changing color to make the relief with 20 stitches, change the thread again to make 15 more stitches. We repeat the procedure, up to the desired height of the basket, 14 rows for me, as you can see in the image:

Source : Photo taken by author @xeliram on a cell phone.
- Later we will replace where we knit in blue we will knit in green, with half a low stitch. We weave with the thread of various colors and above the blue color we weave in green color, for the next turn we take only one row, for the decorative arches, creating a turn of loose threads to make the boleritos.

Source : Photo taken by author @xeliram on a cell phone.
- For the mufink we follow the following diagram:


Source : Photo taken by author @xeliram on a cell phone.
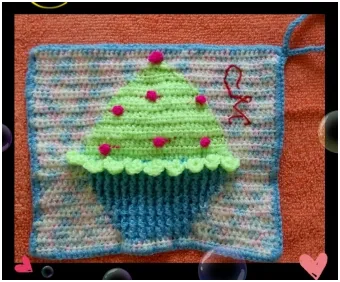
- Finally we hook the decorative green arches, in the row that was left in step 7. We weave around the edges in blue with low points and in each corner we make three low points in the same hole. Making some fuchsia chocolates leaving thread to sew.


Source : Photo taken by author @xeliram on a cell phone.
Note: The photos were taken by the author @xeliram Instagram:@tiendaxeliram


I am Marilex Porteles, Mathematics teacher, researcher, dreamer, I like weaving, swimming and I am the mother of a beautiful girl.
Give UPVOTE if you like, COMMENT and RESTEEM for others to know THANK YOU.

Give UPVOTE if you like, COMMENT and RESTEEM for others to know THANK YOU.