
Be sure to click on the image to view full screen!
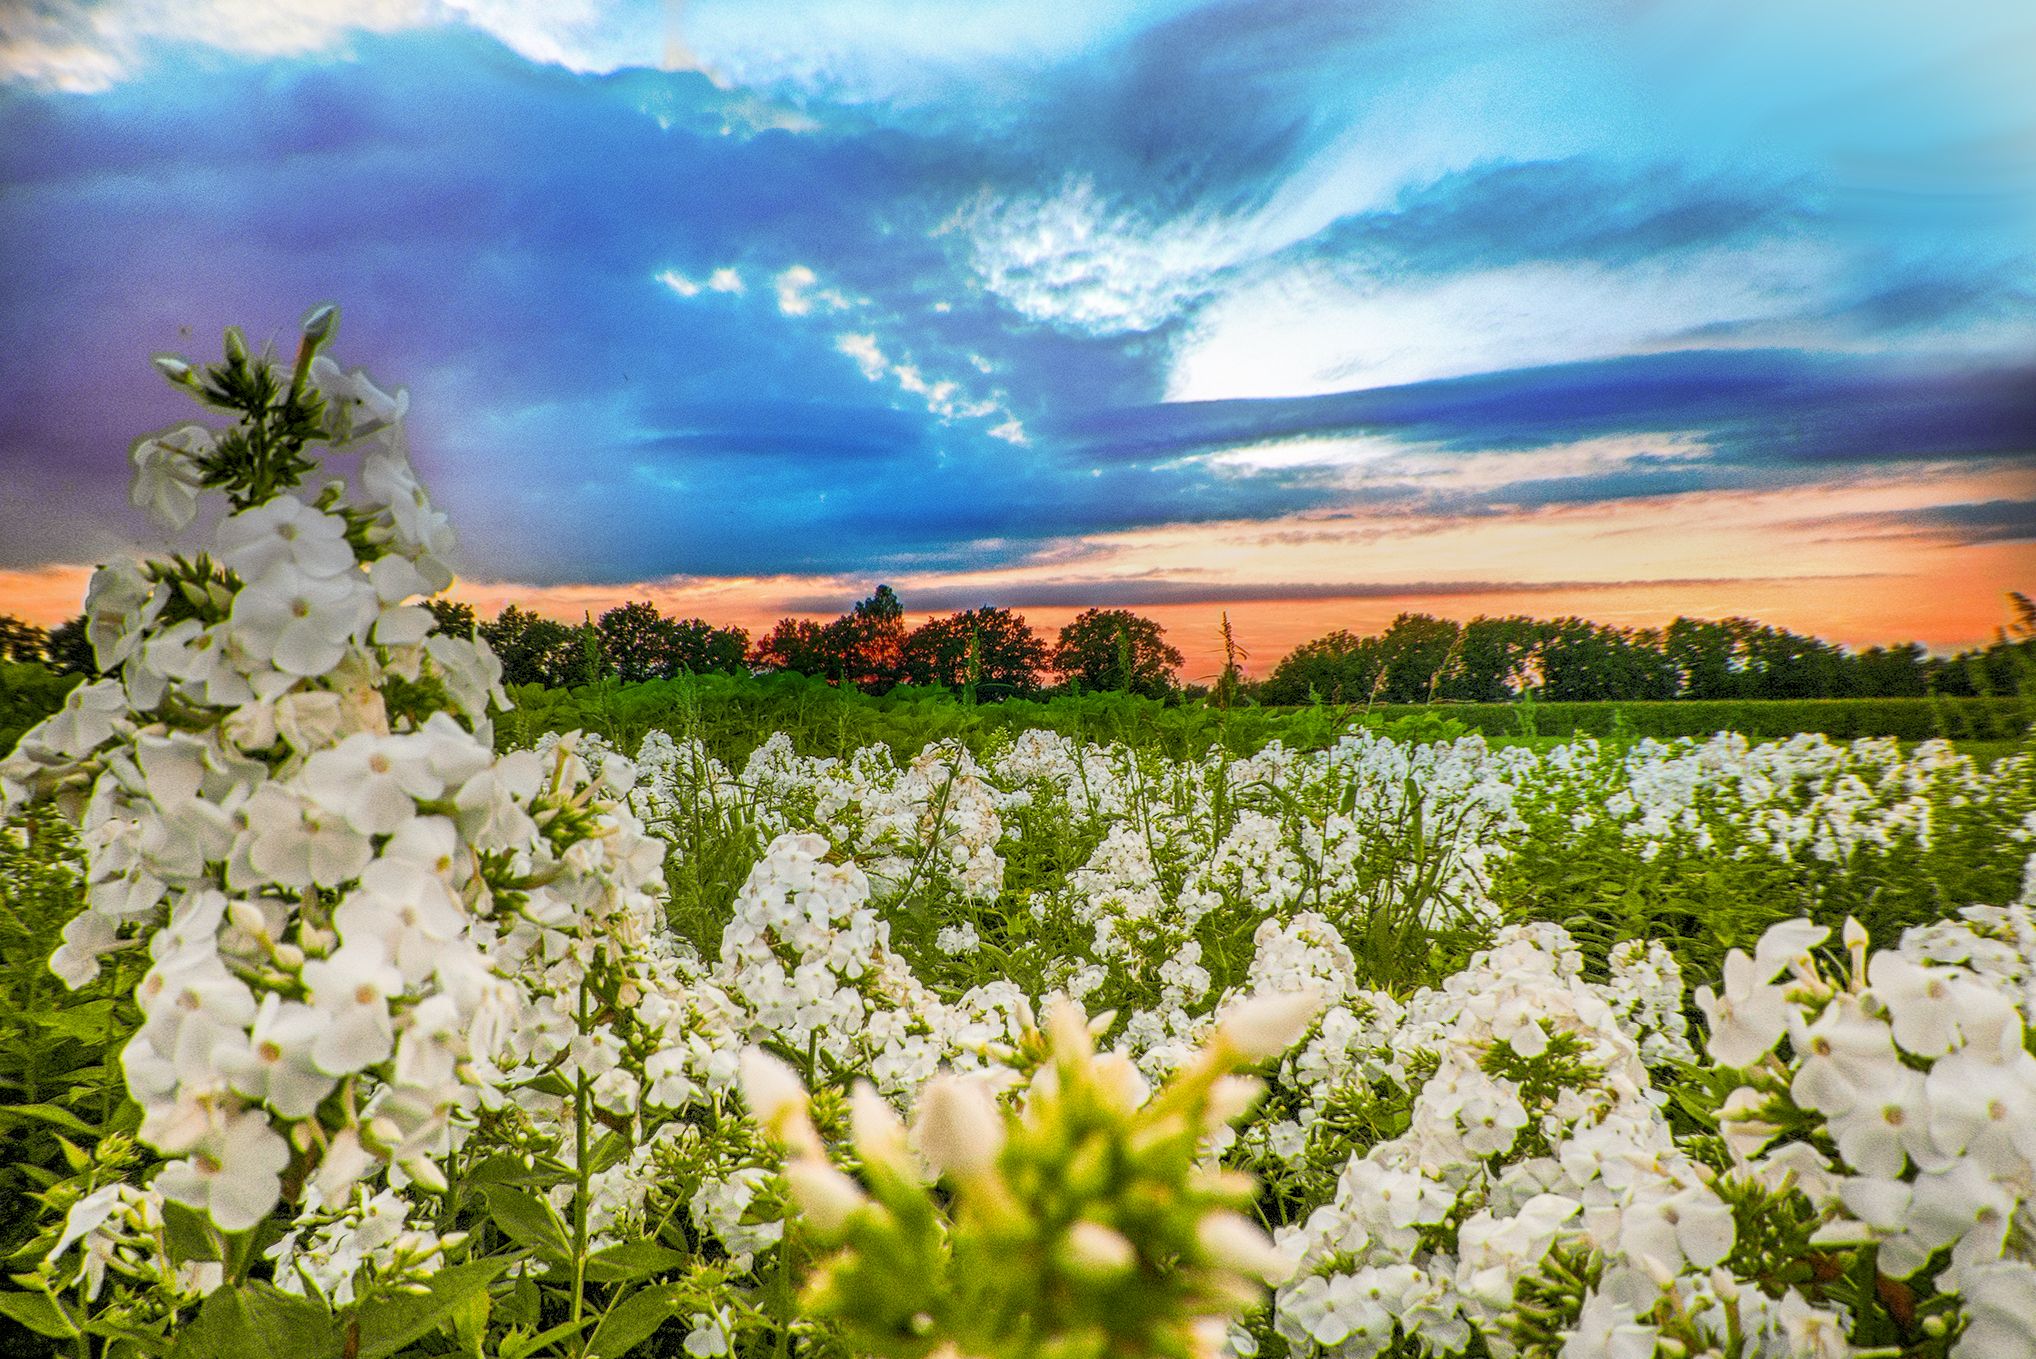
Everyone knows it, you see a real FAN-TAS-TISCH landscape in front of your eyes and you make that ONE picture, that dream shot of that wonderfully beautiful landscape. When you arrive at home, you go enthusiastically behind your computer to view that one dream picture. Full of expectation you stare at your screen and then .... what should have been magically beautiful is a big disappointment. Instead of the beautiful cloudy sky with colorful flowers in the foreground you have a lot of light air and too dark flowers. Nothing amazingly beautiful colors ... how is that possible?
Be sure to click on the image to view full screen!
Or your friend is sitting in front of the window with behind her the skyline of Bangkok in the sunset you have a beautiful view from your 15th-floor hotel room. Your friend is sitting dreaming in the windowsill looking out and you have the chance to take that ONE shot. Softly you sneak through the room, carefully check your composition and click. For the sake of caution you only make a few photos with different exposures ... only when you look at them on your pc, again that disappointment because how is that possible? What a beautiful picture should have been is not, on every picture or your friend has become a black spot, or your beautiful sunset has become a white spot.
Recognizable? What is happening here? Why is that?
That is the dynamic range! The dynamic range is the difference between the lightest and darkest part of a scene. Our eyes can handle this very well, but unfortunately the sensor of even the most expensive camera is limited. The human eye has a dynamic range of about 30 stops. The most modern camera with a full frame sensor will achieve a dynamic range of 10 or maybe 15 stops. That is quite a difference right? That is also the reason that in the examples I described above the photos would not be as you had hoped.
But can you do this?
There are several ways to increase the dynamic range of your camera sensor again so that the picture more closely matches what you have seen. And one of the ways is again to pay close attention to your histogram. As soon as you see that your histogram is going to fall outside the lines on both sides, the dynamic range of your sensor is insufficient for the scene you want to photograph.
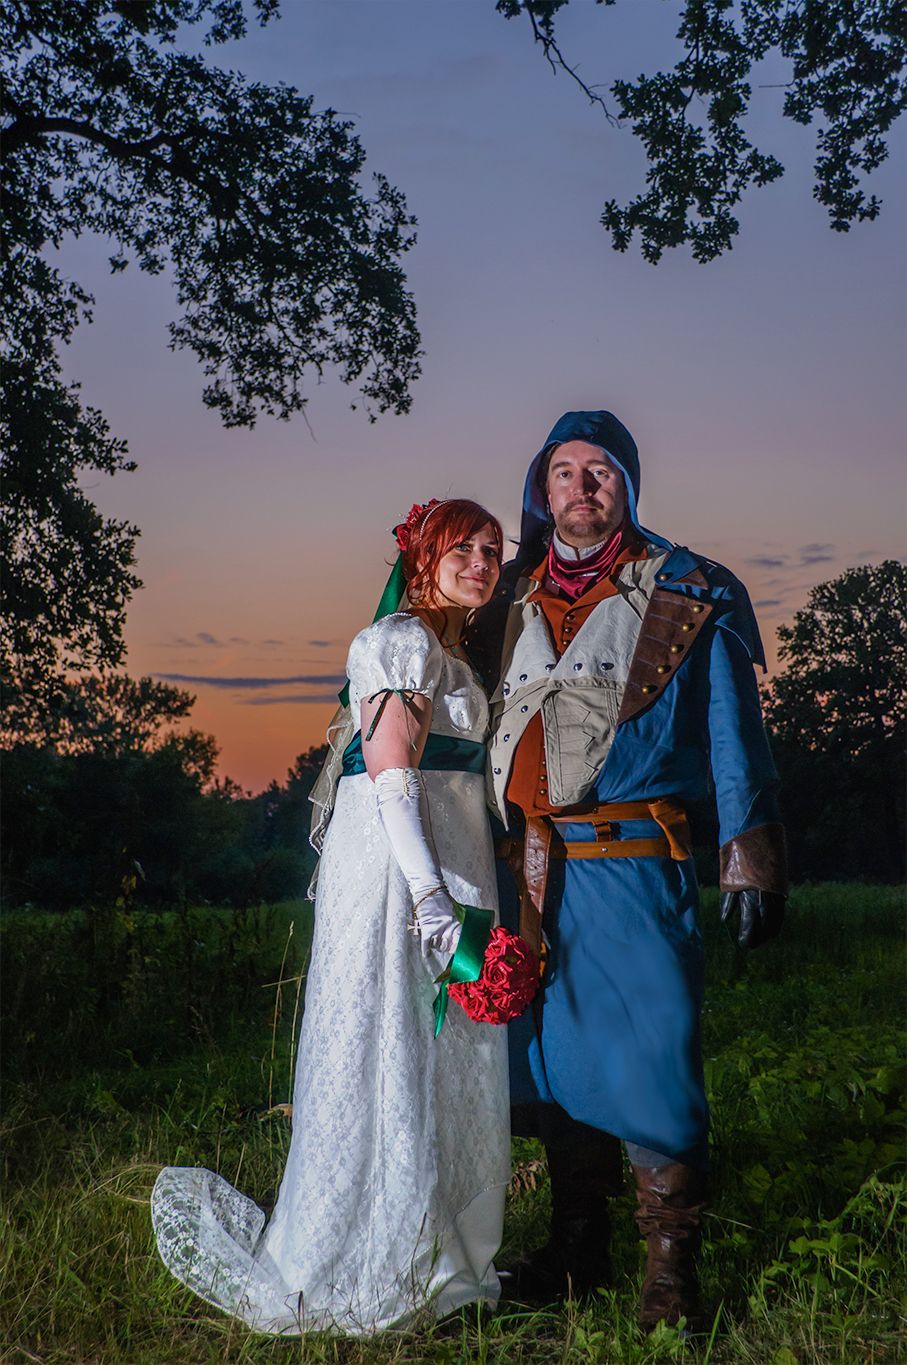
You can choose to highlight your subject with a flash and possibly a reflection screen as I did in the picture below. To explain the cosplaying 'wedding couple' well, but also to capture the sunset beautifully, I needed more light on the bride and groom ... Inflitsen was the solution here. To prevent overexposure, I chose to have my fill-in flash go through a reflection screen.
Be sure to click on the image to view full screen!
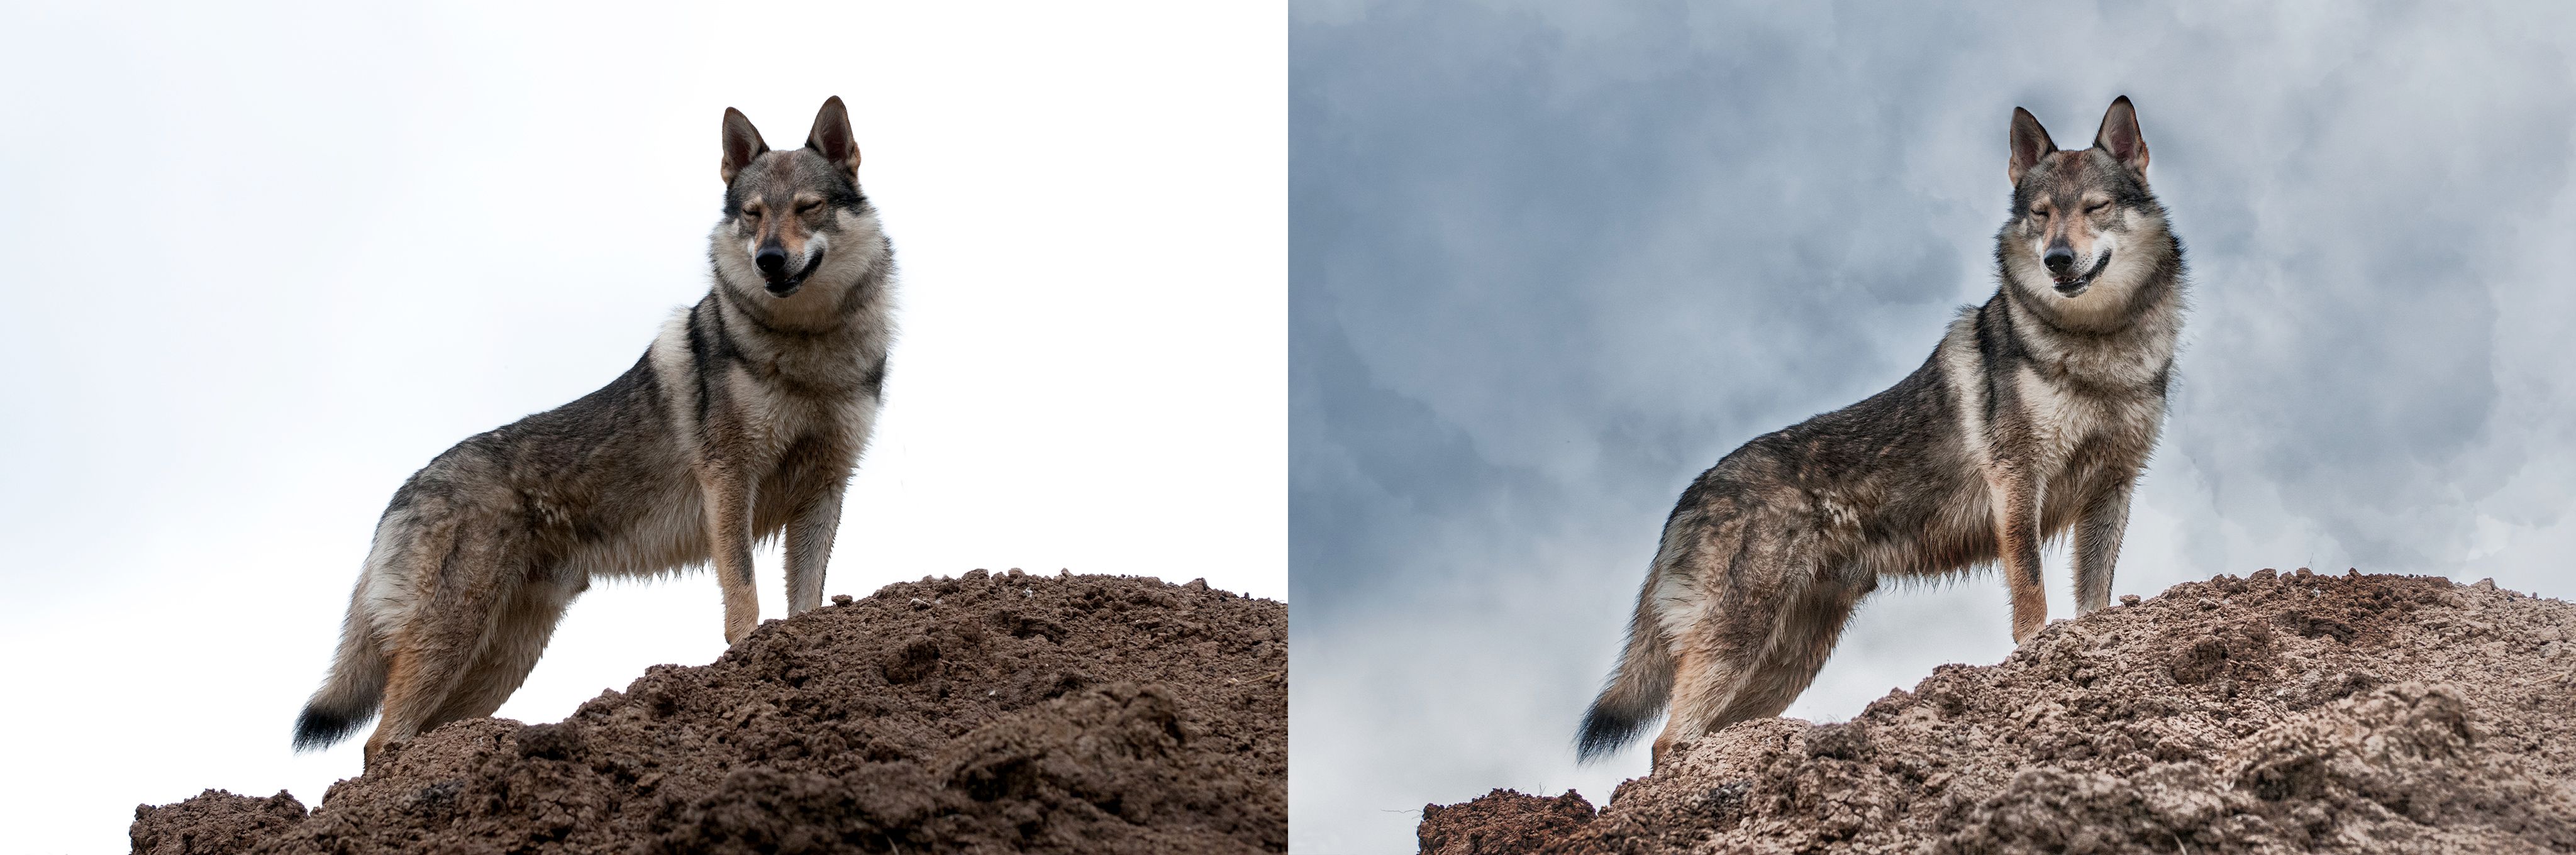
Another way to stretch your dynamic range is during post processing. If you know that you can still recover a lot of information in the overexposed parts, if you overexpose during the shooting that you will set the lighting to keep your dark parts within the dynamic range of your sensor. Everything that is closed black is lost information. Those pixels no longer contain information that you can retrieve. In the overexposed part of your photo you can often still retrieve a lot of information.
Be sure to click on the image to view full screen!
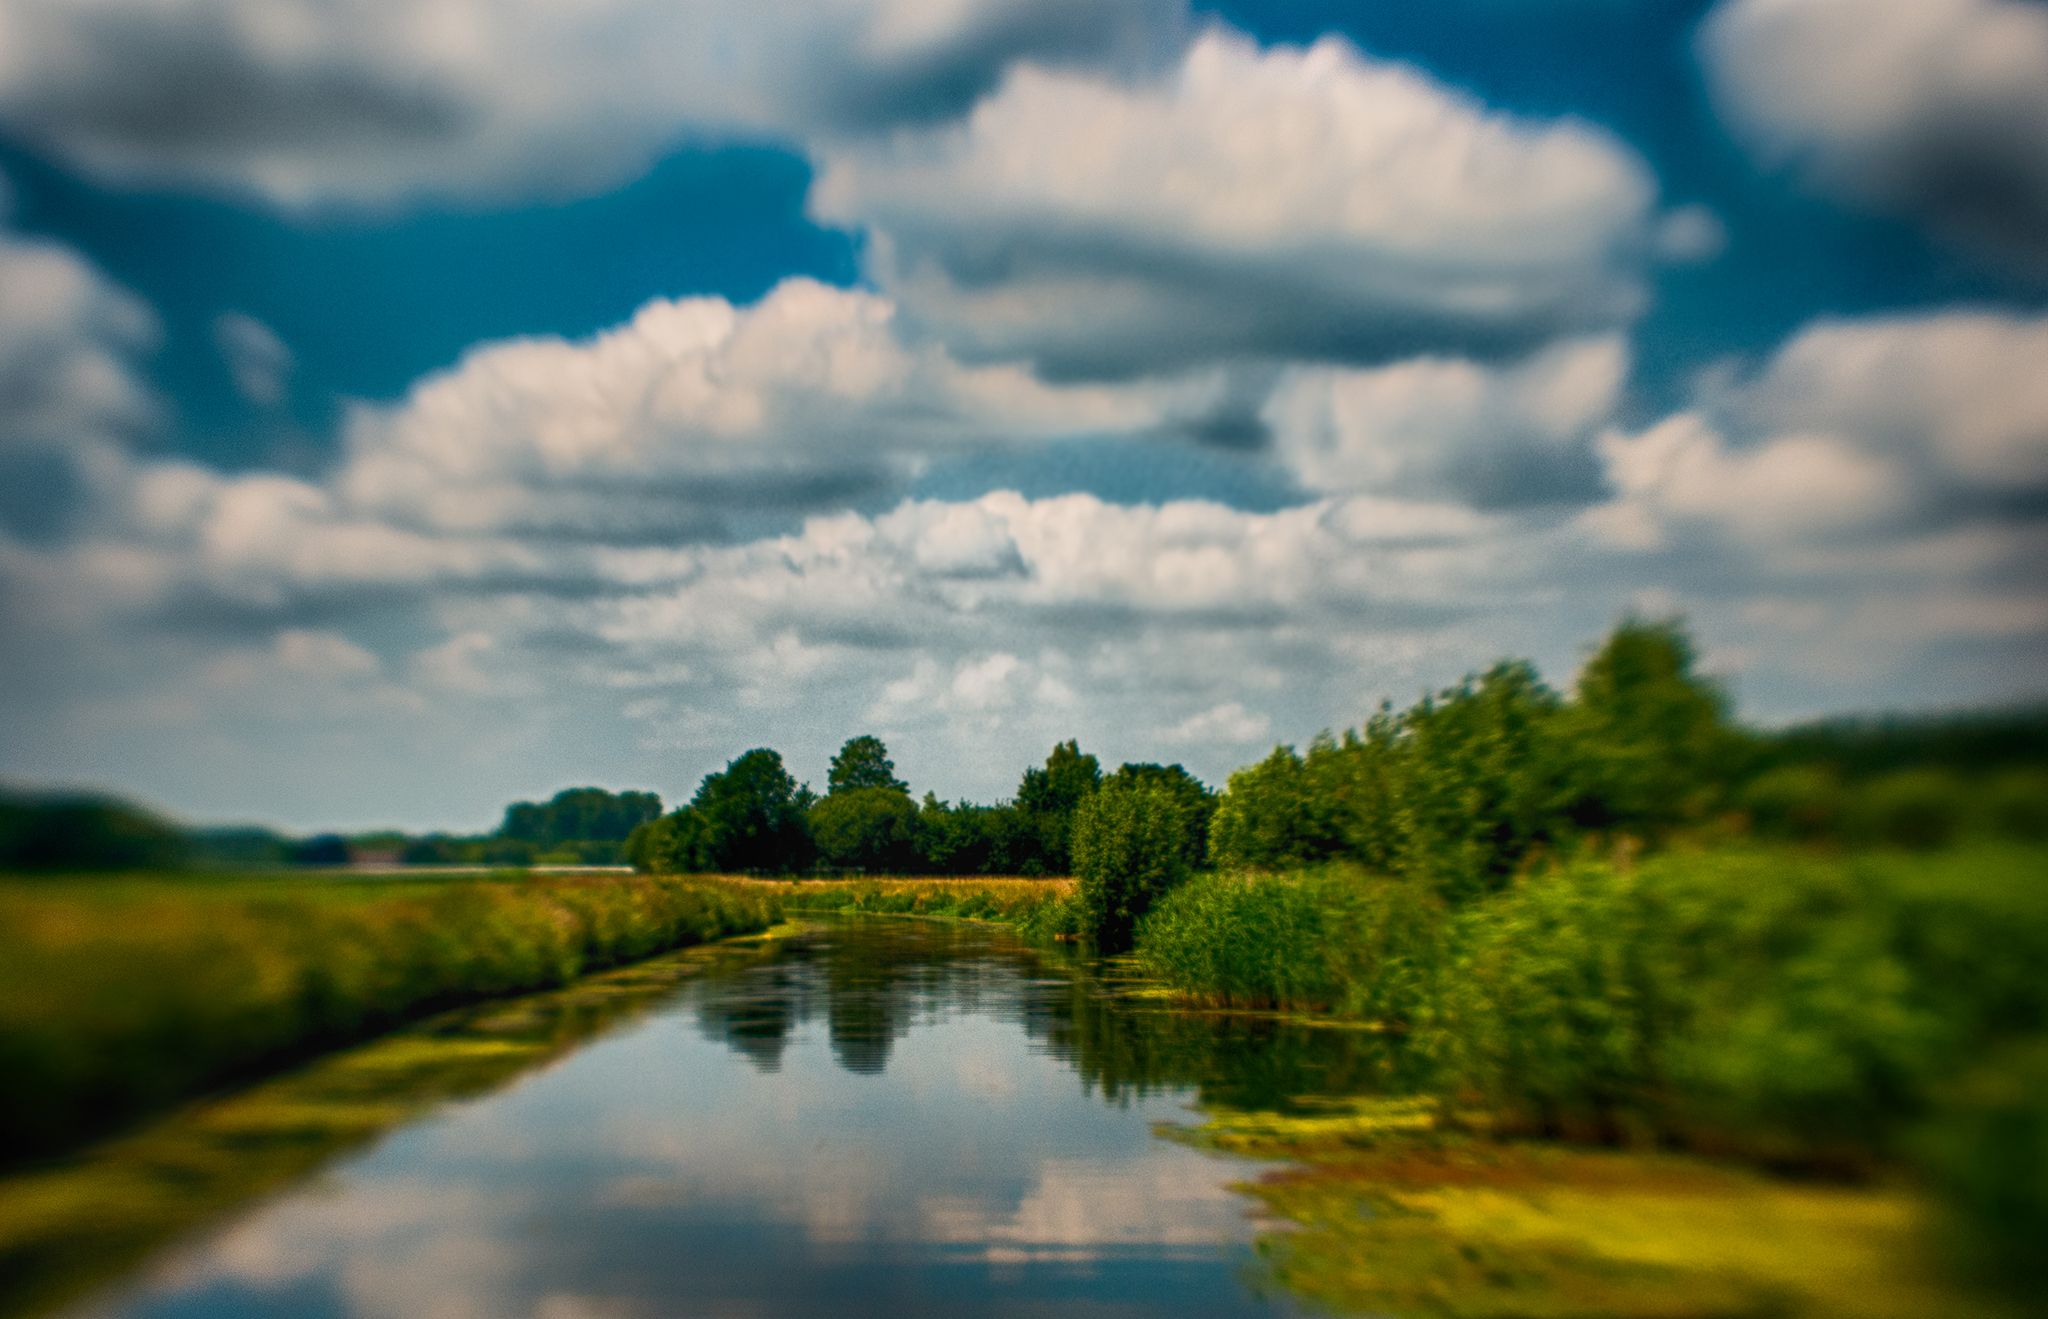
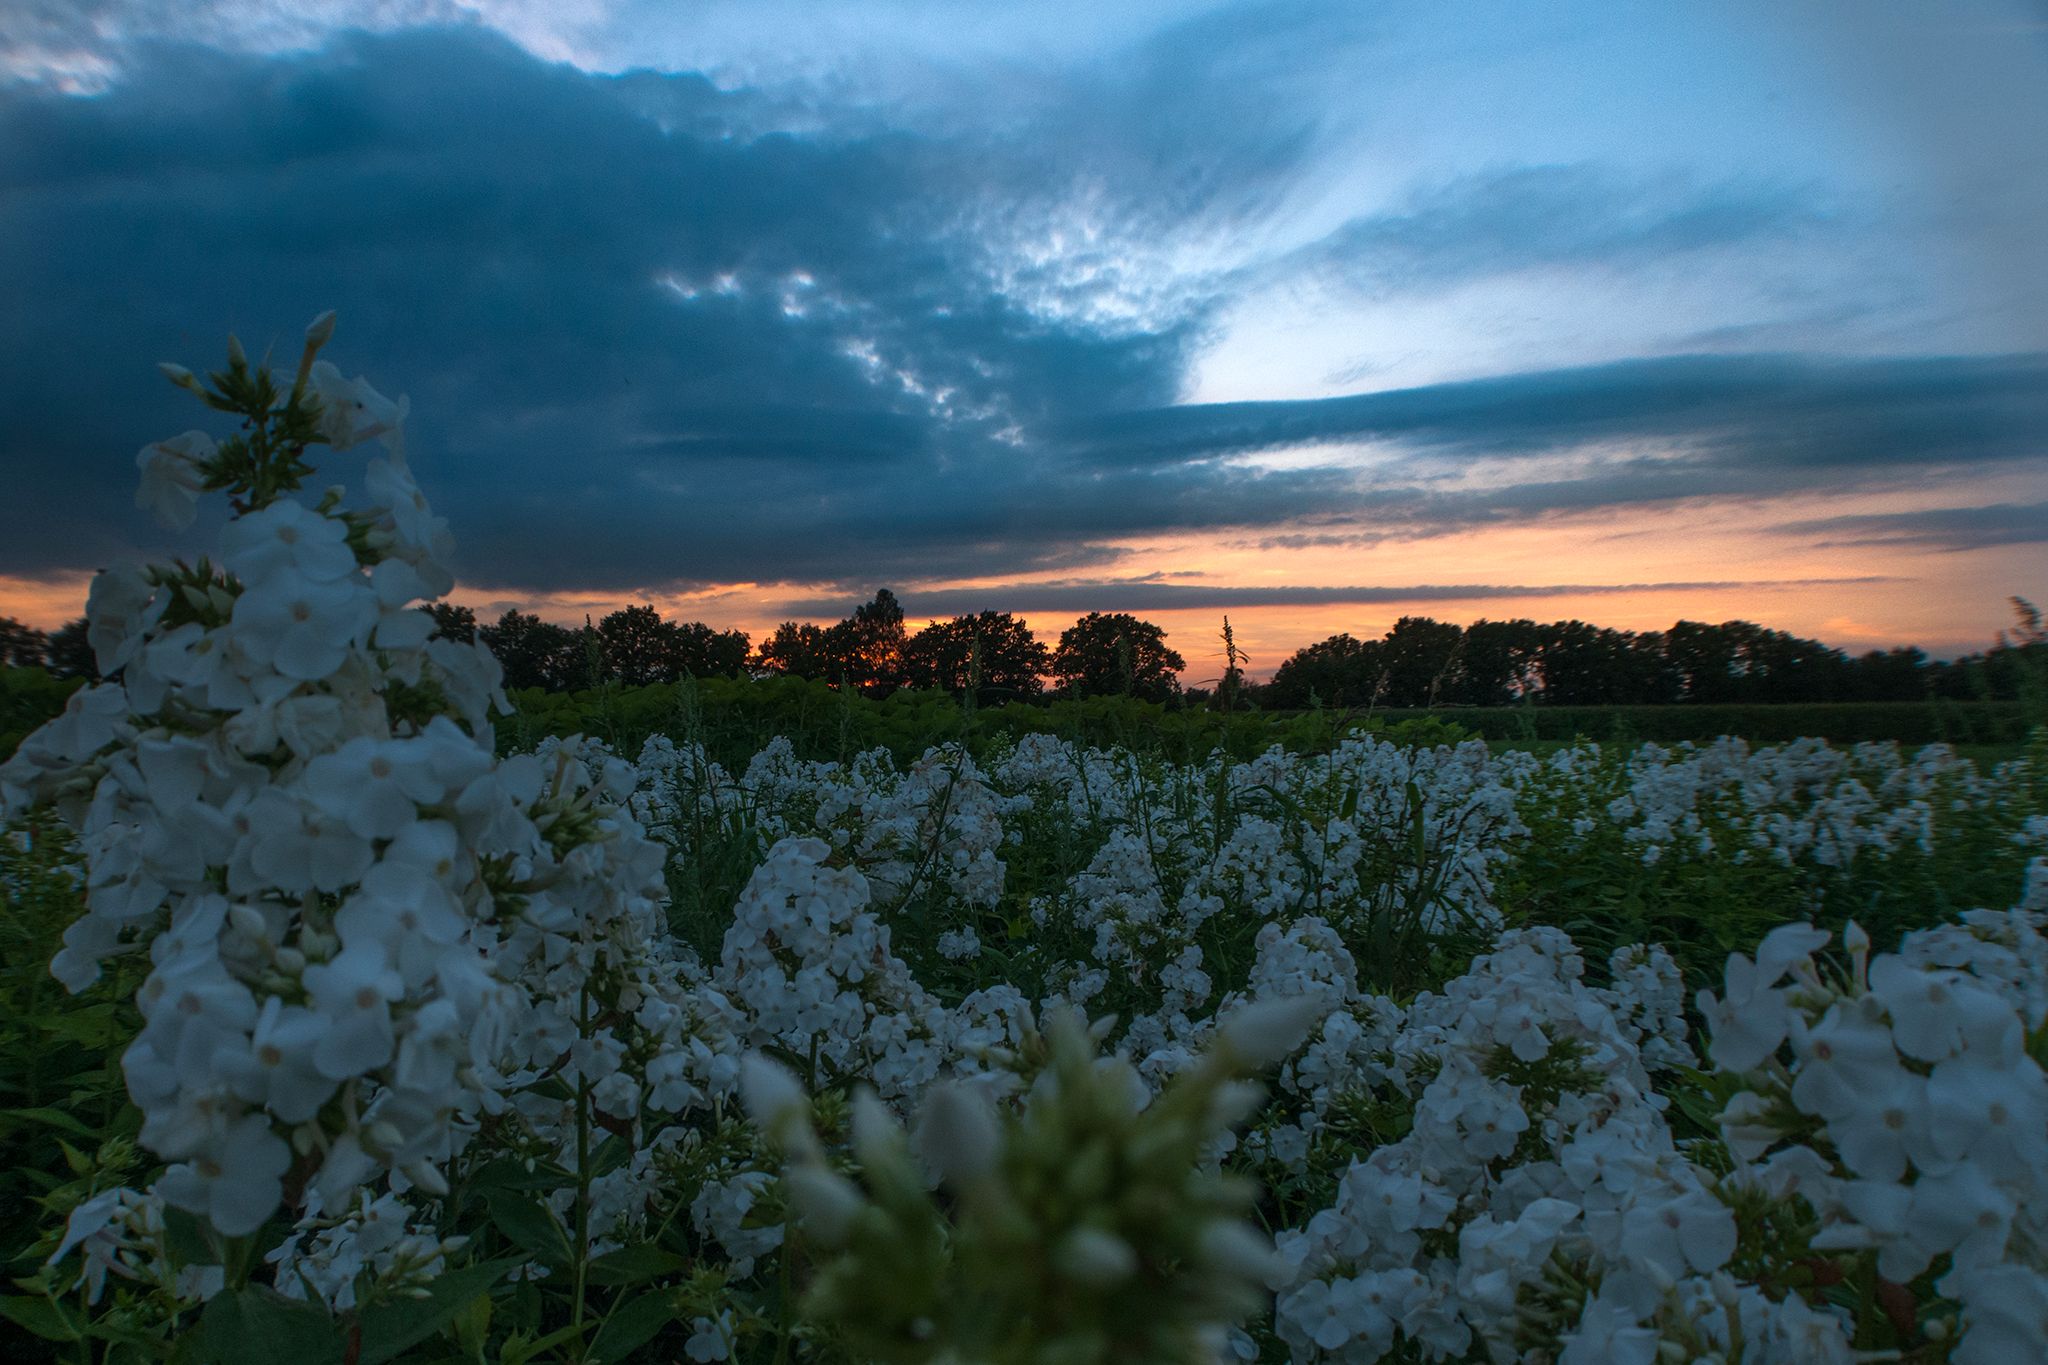
And finally you have the possibility, if the scene lends itself to it, to make an HDR photo. This greatly increases your dynamic range because you combine several photos with different exposures into a photo. The more photos you use for this, the better your final result, but this technique can already be applied by making at least 3 photos of exactly the same. You will of course work from a tripod, and take 1 picture that is underexposed, 1 picture with correct exposure, and 1 overexposed picture. The lighting is adjusted by changing your shutterspeed! Because if you adjust the ISO or aperture you adjust the level of noise or the depth of field, so for that reason you only adjust your lighting by changing the shutterspeed one stop at the time.
You then merge these photos into a photo using your editing software. That is also a common technique for increasing the dynamic range of your camera.
And I used that technique in the pictures below.
Be sure to click on the image to view full screen!

Be sure to click on the image to view full screen!
Be sure to click on the image to view full screen!
But is it always necessary to use HDR or to light the dark areas in your photo with a flash? Here I can simply answer NO. Most landscapes have a dynamic range of 6 to 8 stops, on which the sensor of your camera is more than adequately calculated. However, here is a side note, the sensor of the older cameras is often calculated at a maximum of about 6 stops, so older cameras can reach the dynamic range limit faster.
That is why it is always important, keep an eye on your histogram, and once you see in the histogram that the dynamic range in your scene is too big, look for alternative possibilities so that you can take that picture with the dynamic range that you seen yourself.
No matter how good our cameras are, and certainly the latest cameras are fantastic. They all see it as something different from our human eyes.

Be sure to click on the image to view full screen!