

Many factors affect the overall quality of your images, but one of the most obvious is sharpness.
There will usually be an area of your shot that you want to be in crisp focus, even if you choose to use depth of field to separate the in-focus elements from the background with a nice blur, or bokeh, effect.
For the purpose of this post I'm going to assume that you know a little about the exposure triangle and what depth of field is and why it affects sharpness. If you don't, the explanation is a little too long to include with these tips, so check out the links before reading on.
In landscape photograpy we often aim to have the whole image as sharp as possible. Here are 5 tips to help you take sharper landscape shots:
1 - Use a tripod
If, like me, you lothe the idea of carrying extra stuff, this may be a dissappointing start. However, using a tripod to steady your shots gives you the most bang-for-buck in getting sharp photos.
Motion can be introduced into your images if the camera moves a perceptible amount whilst the shutter is open. When you hold a camera in your hands to take a shot, small movements can be introduced, even if you can't tell you're moving.
You can mitigate this by ensuring that your shutter speed is a short as possible for the shot you want to take, but the only way to eliminate movement completely is to use a stabalising device like a tripod.
If you're new to using a tripod for photography then you might be excited to know that in addition to helping keep your shots crystal clear they also enable a bunch of other cool techniques, such as exposure bracketing and the longer shutter speeds necessary for astrophotography and long exposure photography.
If you don't have a tripod with you, look for another way to stabalise your camera. Sometimes placing your camera on top of a wall or table, and levelling it up with the strap can be a makeshift alternative.
Tripods come in all shapes and sizes. Above left, a Gorillapod is a lightweight and flexible option, capable of providing traditional tripod orientation as well as gripping onto objects like railings and fences. Above right, a professional tripod made of carbon fibre, a material that minimises the transmission of vibrations.
Pro tip: Extreme winds can play havoc with tripods, introducing extra vibrations or knocking them over completely. Many quality tripods have a hook at the base of the centre column. To give extra stablity in extreme conditions pack a cheap bungee cord and strap it around something heavy, like a rock or your gear bag.
2 - Lose the strap
In windy conditions a camera strap is like a kyte tied to your camera. It will catch the wind and blow around, adding movement to your shot whilst bashing you in the face (depending on the wind direction). If you have a neck strap on your camera, tie it around the tripod to prevent it blowing freely in the wind. Or, if you can, detach it completely and keep it in your pocket.

Above: The Peak Design clutch strap is an alternative to traditional neck straps supplied with your camera. It has a much lower profile, meaning it's less likely to catch the wind when your camera is on a tripod. It also has quick release fastenings so you can easily remove it.
Pro tip: The standard straps supplied with most cameras are fiddly to attach and detach, even in the best conditions. For a range of detachable straps, including alternatives to the standard neck strap, check out Peak Design. Their straps are some of the best I've ever used, and they have a nifty quick release mechanism which is perfect for quickly switching to tripod mode.
3 - Use a self timer or remote shutter release (aka cable release)
Most cameras have an inbuilt timer function, and this isn't just for selfies and group shots. Use the inbuilt timer to trigger your camera to take a shot, then remove your hands from the camera completely. By the time the shot is taken any small vibrations caused by you touching the camera will have dissippated. Most cameras have default options of a 2 or 10 second timer. Usually 2 seconds is enough.
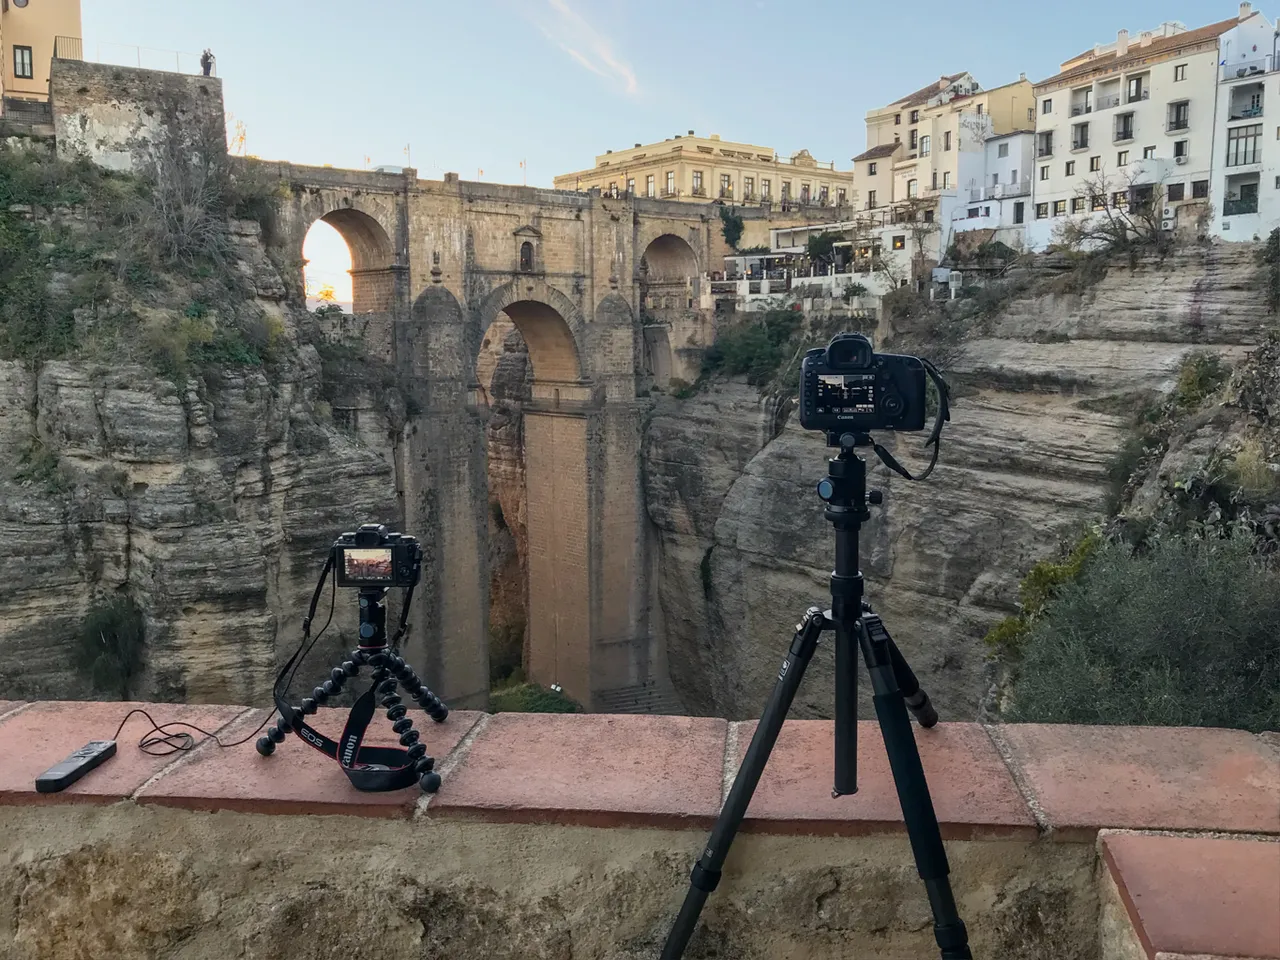
In the image above, the camera on the left is connected to a remote shutter release, and the camera on the right is using an inbuilt self timer.
Pro tip: To trigger the camera without risking any movement, check out if your camera model has a smartphone companion app. Models from Canon and Fujifilm can often be used with a remote shooting app which triggers via wifi or bluetooth.
4 - Disable image stabalisation
Many semi-pro and pro series lenses have inbuilt image stabalisation. Manufacturers call it different things, such as IS in the Canon world, OIS in the Fuifilm world, and so on. When you are using a tripod you should always turn it off.
I know, confusing, right?
IS works by using a small gyroscope inside the lens. This flips backwards and forwards like a pendulum expecting movement and aiming to counteract it. When you know the camera and lens are stable it's best to switch off IS because that small gyroscope can actually add movement.
Look for a switch located on the side of your lens labeled IS, OIS or similar, and set this to off when your camera is mounted on a tripod.

Lenses with Image Stabalisation functions usually have a sliding on-off switch. Different manufacturers choose different terms for the same technology, such as OIS (Optical Image Stabalisation), VR (Vibration Reduction), and so on.
Pro tip: Remembering to disable IS when mounting your camera on a tripod, and then enabling it again afterwards, can be difficult. I've often taken a series of hand held shots wondering why the focus seems to be off before realising the blurriness is actually just camera shake because I forgot to turn IS on again. Try thinking of this as a mental checklist at the point you attach and detach your camera from the tripod. E.g. un-screw bracket, place camera, screw in brachet, disable IS and vice versa. This will help it to become second nature.
5 - Consider whether you need the lens hood
Many lenses come with petal-like hoods which screw onto the end of the lens and provide shade to the front elements which helps to avoid lens flare. A secondary benefit of a lends hood is to reduce the possibility of bashing the glass elements on rocks or other objects as you move around, so I normally keep mine on all the time.
Lens hoods are most beneficial when shooting in direct sunlight. If your shot doesn't need it, consider removing the hood whilst your camera is on a tripod. By reducing the weight and size of the camera and lens combination, you'll reduce the likelihood of a gust of wind causing vibrations.

Lens hoods on telephoto lenses such as the Canon EF 70-200mm can add as much as a third of the length of the lens body. This can add weight to skew the balance of your tripod, and make it more likely that your setup will be shaken by wind. Image from the Canon product page.
Pro tip: Figure out whether the lens hood is necessary by assessing whether sunlight is directly hitting the front glass element of your lens. If in doubt, quickly remove it and see if lens flare is introduced in a test shot.
I hope these tips are helpful in guiding you to take better images. If you have any questions, or would like to see a follow-up post on anything in particular, give me a shout in the comments.
About me:
I'm a travel and landscape photographer based in the UK. I work on the Global Photo Guides series of digital guidebooks for photographers. You can see more of my work on Instagram, 500px and ViewBug.
About the embedded images:
All images included in my posts are my own unless otherwise credited. Please respect the effort they took to create. These images may be shared with attribution, but may not be used for commercial purposes without permission. Full resolution versions are available for licensing, prints etc - please drop me a line.