
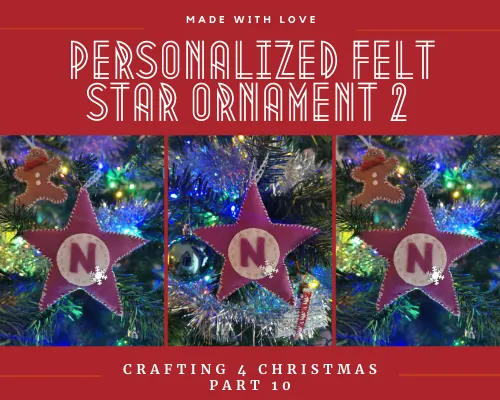
Introduction
A little over a month ago, I started this series called "Crafting 4 Christmas" to create my own Christmas decoration and ornaments for the Christmas tree. Not only because it's super fun to do so, but also because it saves quite a bit of money and on top of that, I can create things exactly as I love them rather than buying just something that's ok but not really fitting the rest of the decoration.
I aim on creating at least 25 crafts and episodes of "Crafting 4 Christmas" this year, and of course hope to inspire others to start crafting their own ornaments. I want to show others that it doesn't have to be hard to craft your own decoration, sometimes a very simple tutorial is enough. All previous parts can be found at the end of this post.
Materials and tools used
Below listed all the tools and material I've used:
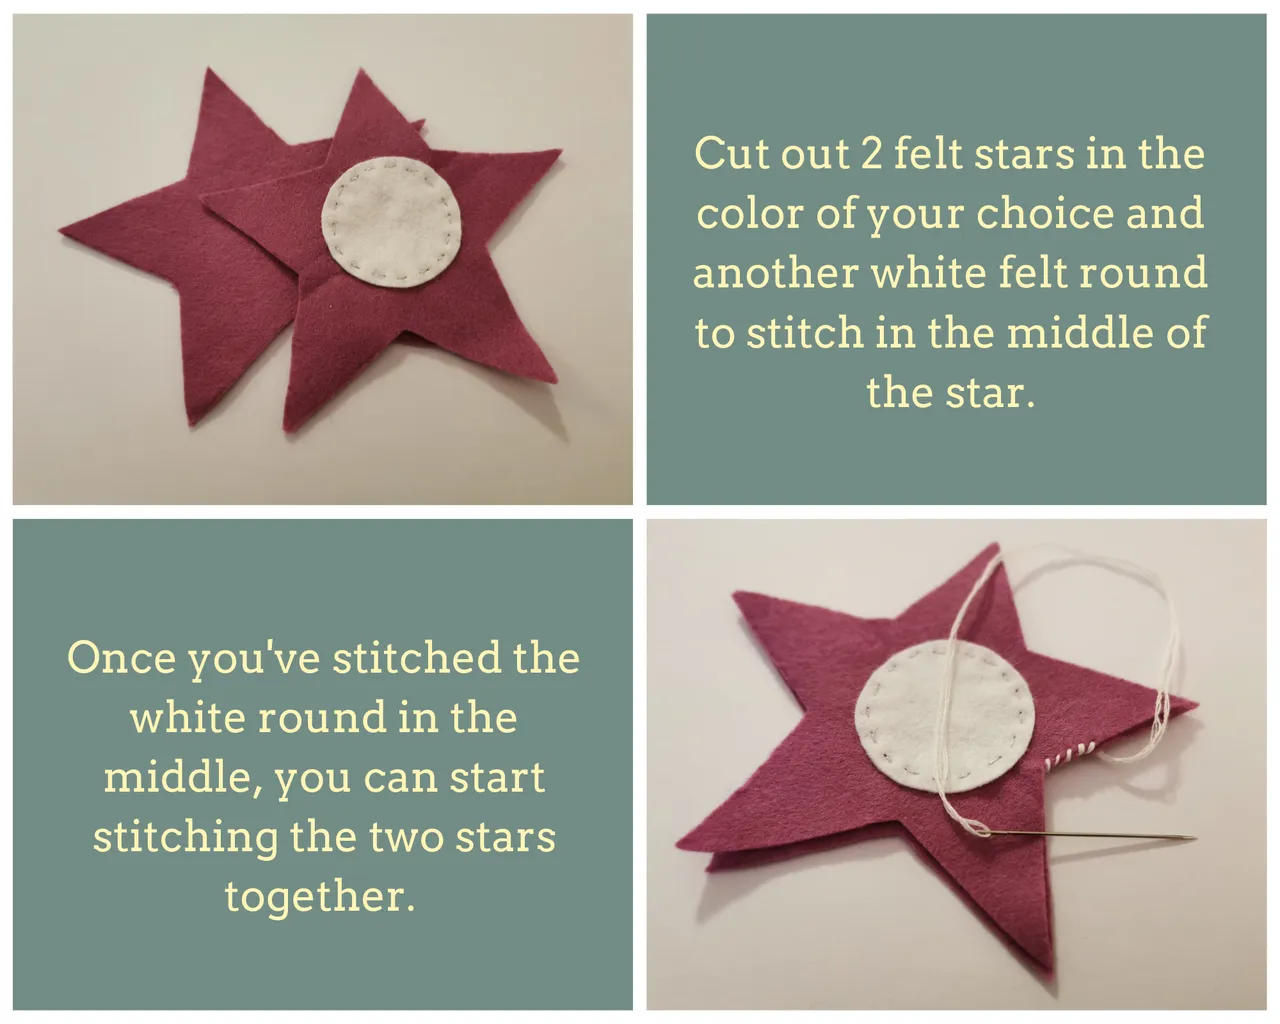
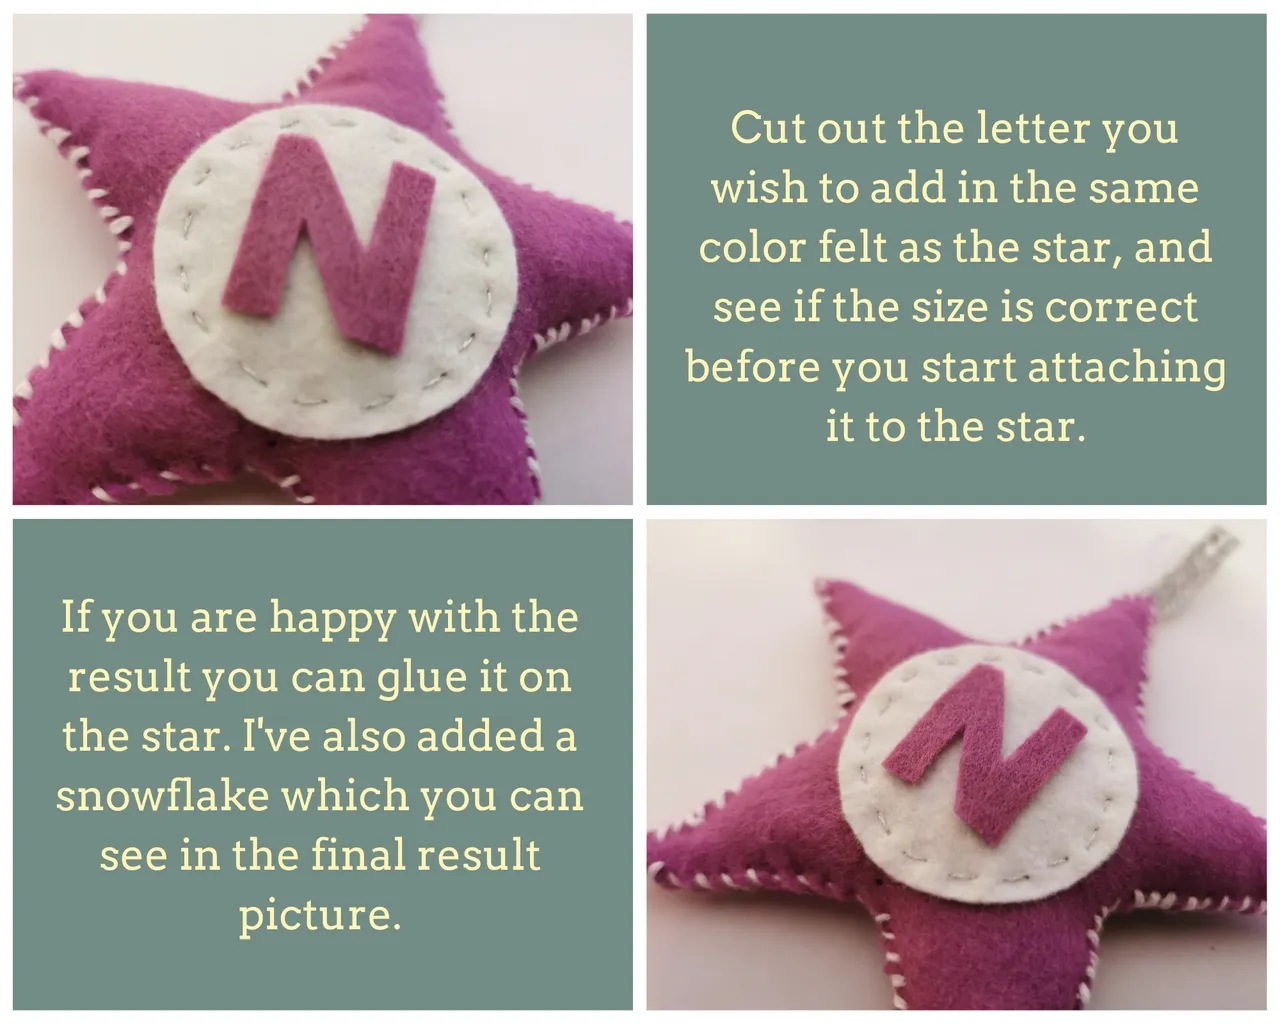
- Two parts of purple felt with approximate diameter of 10 cm for the stars, and from the waste you can cut out the letter.
- A small part of white felt (about 5 cm diameter approx).
- Small part of silver thread to stitch the white round on the star.
- White thread to stitch the star (not sure how much, but plenty).
- A needle.
- Gluegun
- A small snowflake ornament.
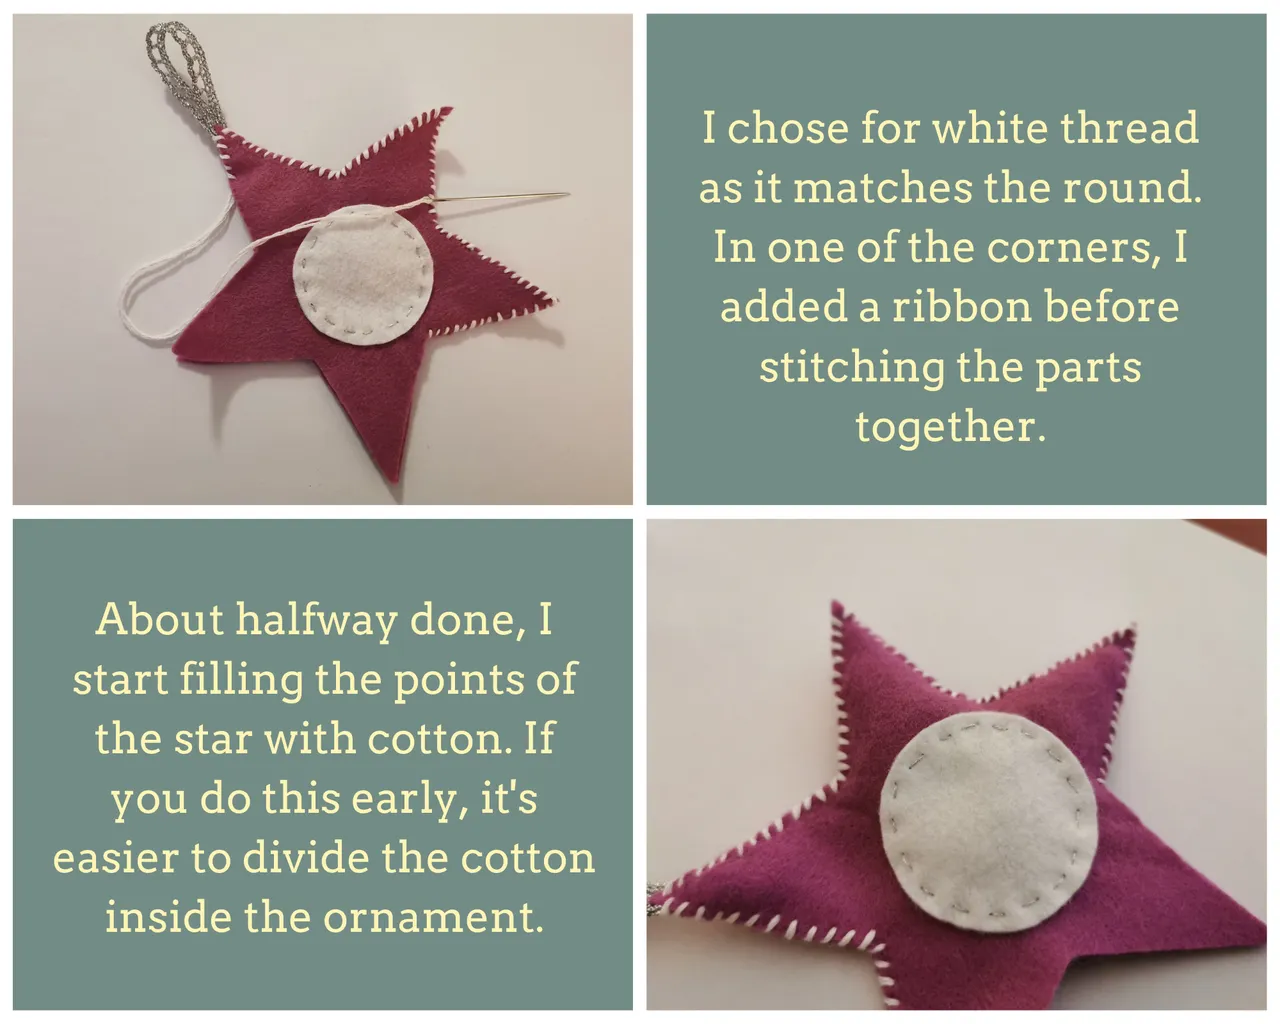
- Silver ribbon to create hanging ornament.
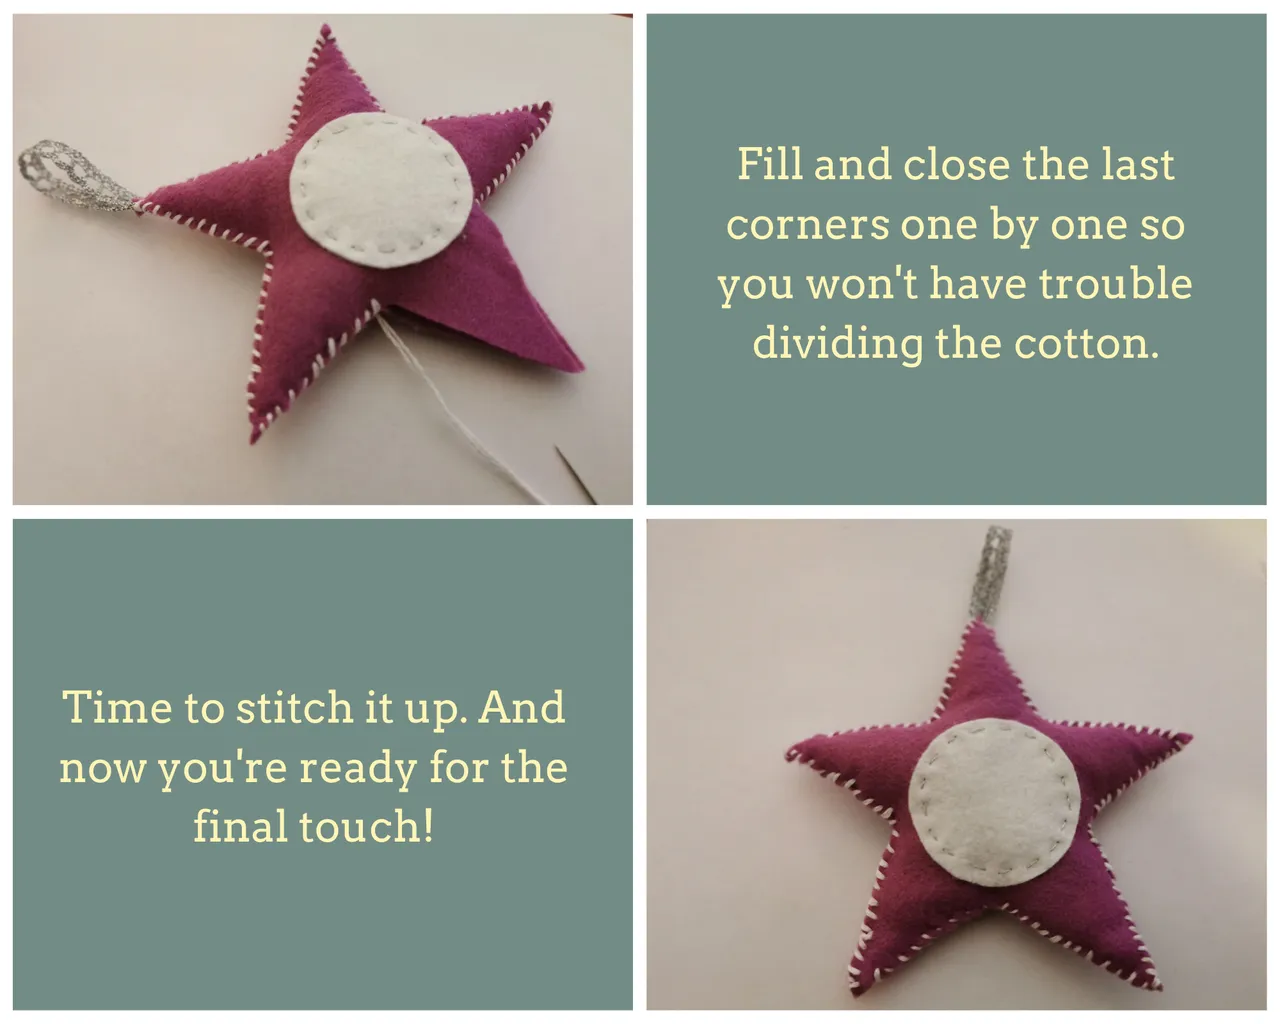
Instructions
Now it's time to look at the instructions. Below I've shared the step by step process in pictures and simple instuctions included.
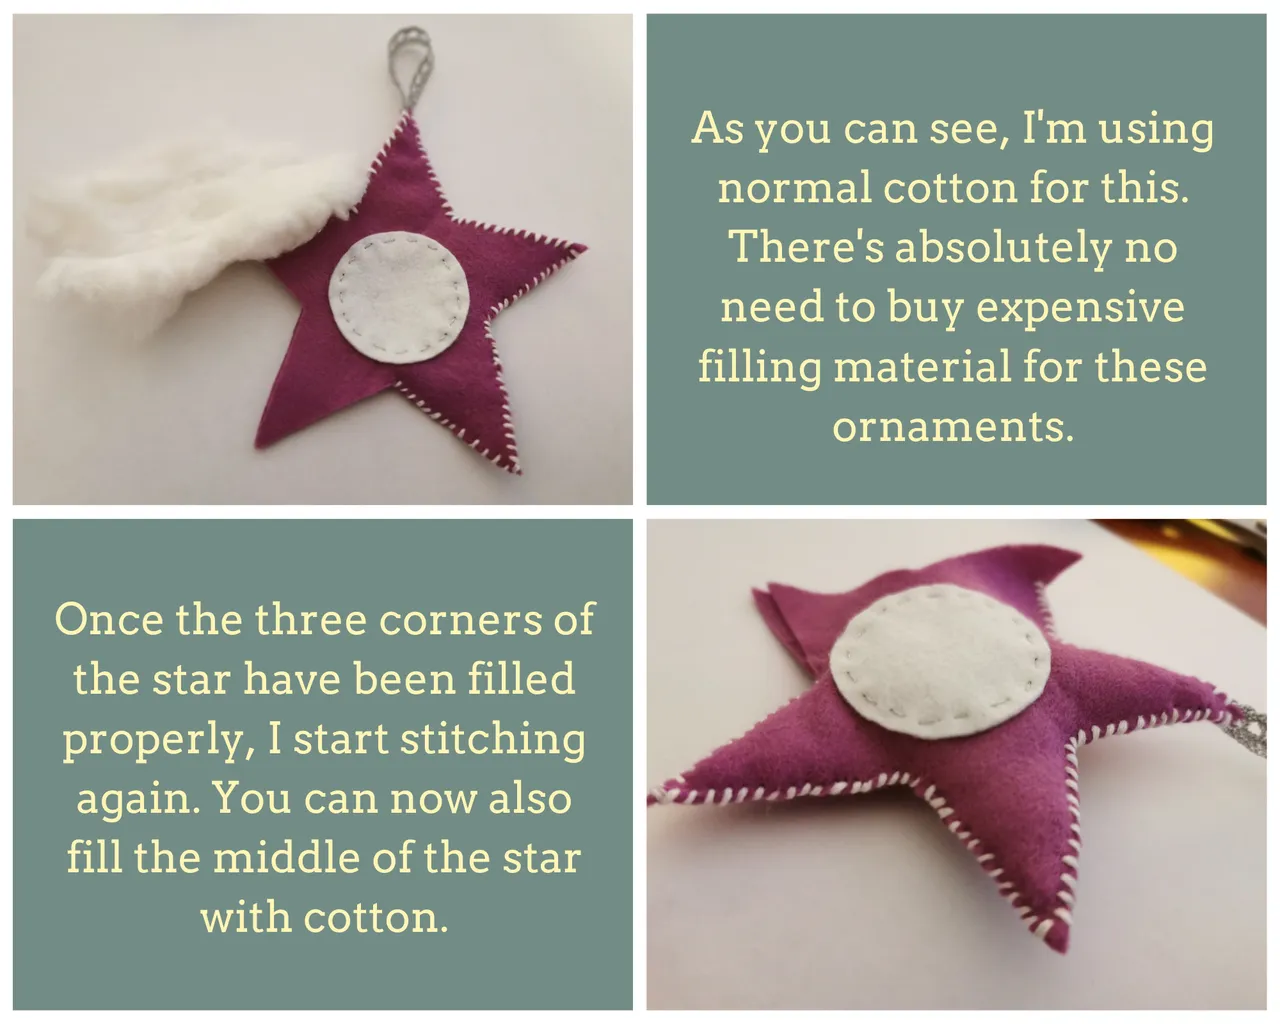
The final result
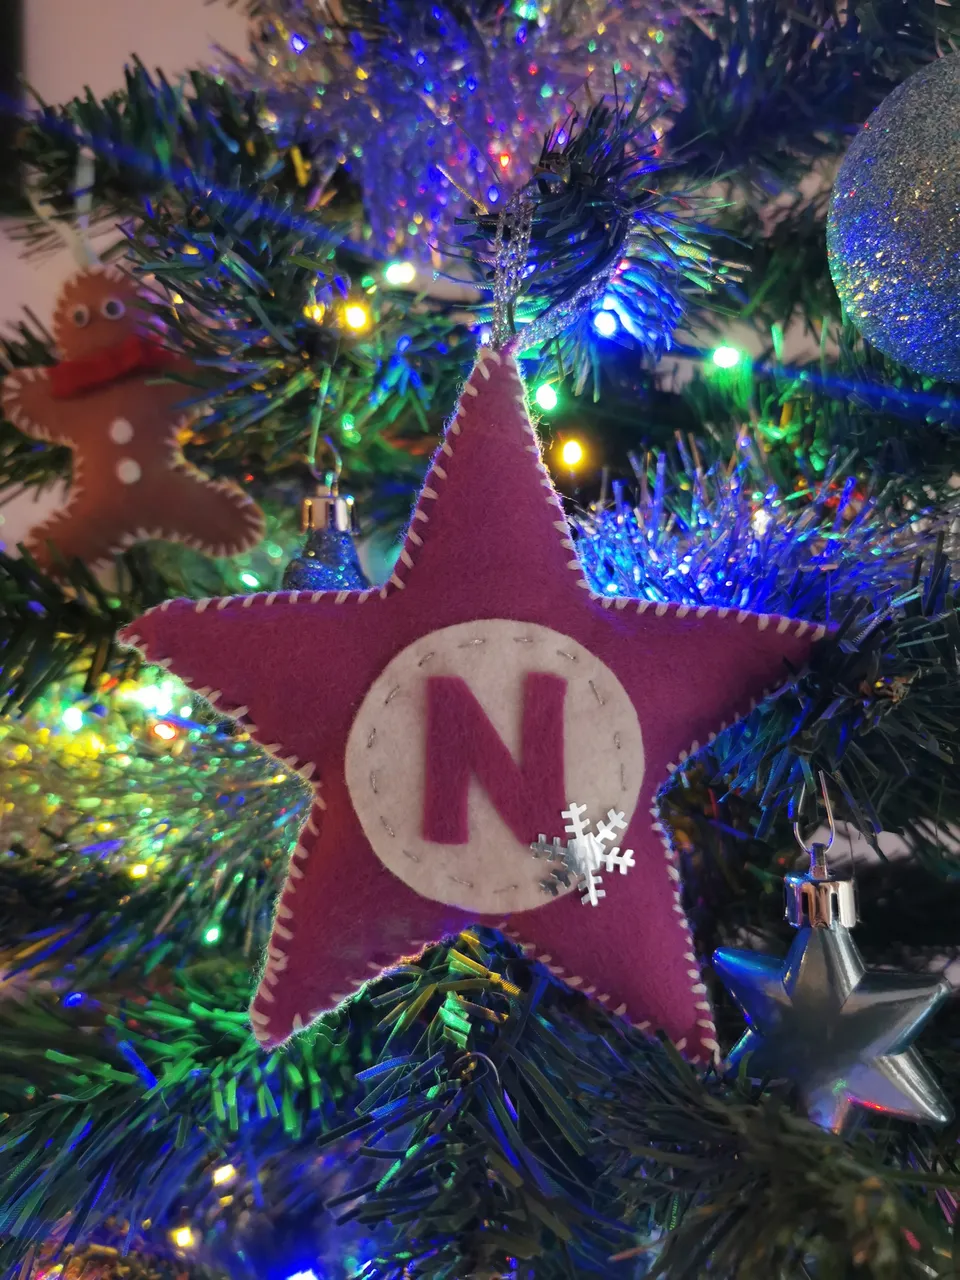
Nice, isn't it? Slowly, the Christmas tree is coming together quite well. I've got some more ideas though, so keep following my posts for more Christmas crafts.
Previous Parts Of Crafting 4 Christmas
Part 1: Christmas tree from cardboard
Part 2: Felt Christmas tree ornament
Part 3: Christmas Card from cardboard and foam
Part 4: Felt Gingerbread man Ornament
Part 5: 3x Cinnamon Tree Christmas Ornament Tutorial
Part 6: Felt Elf Christmas Hat Ornament
Part 7: Sledge From Wooden Sticks
Part 8: Personalized Felt Star Ornament
Part 9: Owl Ornament